How To Filter Leads in CRM

Written by Jenna Tighe
Updated at July 17th, 2023
- Agent Elite University
- My Account
- Design Studio
- Local Presence
-
Website
CRM - Real Estate Real Estate Specific (Click here for a full list of articles) Email Marketing Automation and Integration (Click here for a full list of articles) Integrations Landing Pages Single Property Websites & Flyers Blogs Mortgage Specific (Click here for a full list of articles) Analytics IDX Search Engine Optimization (SEO) Team Marketing Automation
- Facebook Ads
- Agent Elite Max
Table of Contents
Users of the CRM can filter their leads list by various criteria to drill down into their leads.
Accessing and Using the Leads List Filter
- Navigate to Leads > Search Leads.
- Click the “FILTERS” button in the upper right to open the Filter options.
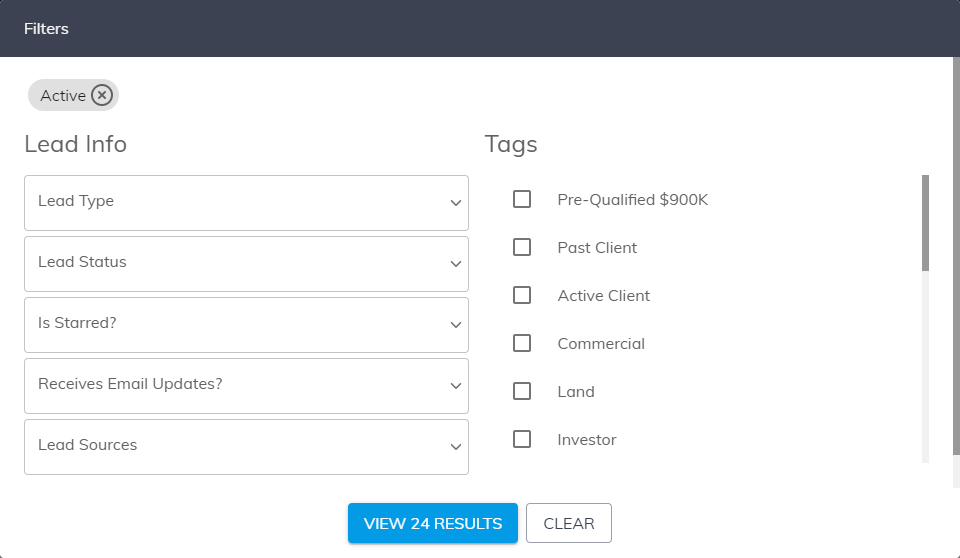
- Select filter criteria by selecting an option for one of the dropdowns on the left side or selecting a tag on the right side.
- Every time a criterion is applied, a grey chip will appear at the top of the Filter options screen to indicate what filters are currently applied. You can remove a filter by clicking the “x” symbol in any grey filter chip.
- At the bottom of the Filter options screen, the blue “VIEW” button will indicate how many lead results match the applied filter criteria. To view the filtered leads, click the “VIEW RESULTS” button to be returned to the filtered lead results.
- Clicking the “CLEAR” button will clear all applied filter criteria.
NOTE: The number in the “FILTERS” button in the upper-right of the lead search screen indicates how many filters are currently applied to the lead results.
List of Filter Options
- Lead Type – filter leads by Buyer, Seller, or Renter type
- Lead Status – filter leads by Active, Inactive, or Deleted lead status
- Starred Leads – filter leads by whether the lead has a star applied or not
- Subscribed Leads – filter leads by whether they subscribed to a campaign/email alert or not
- Lead Source – filter leads by their lead source
- Tags – filter leads by tags that apply to their lead record