How Do I Add Local Resources to My Site?
- Agent Elite University
- My Account
- Agent Elite Max (CRM)
- Design Studio
- Local Presence
-
Website
Real Estate Specific (Click here for a full list of articles) Email Marketing Automation and Integration (Click here for a full list of articles) Integrations Landing Pages Single Property Websites & Flyers Blogs Mortgage Specific (Click here for a full list of articles) Analytics IDX Search Engine Optimization (SEO) Team Marketing Automation
- Facebook Ads
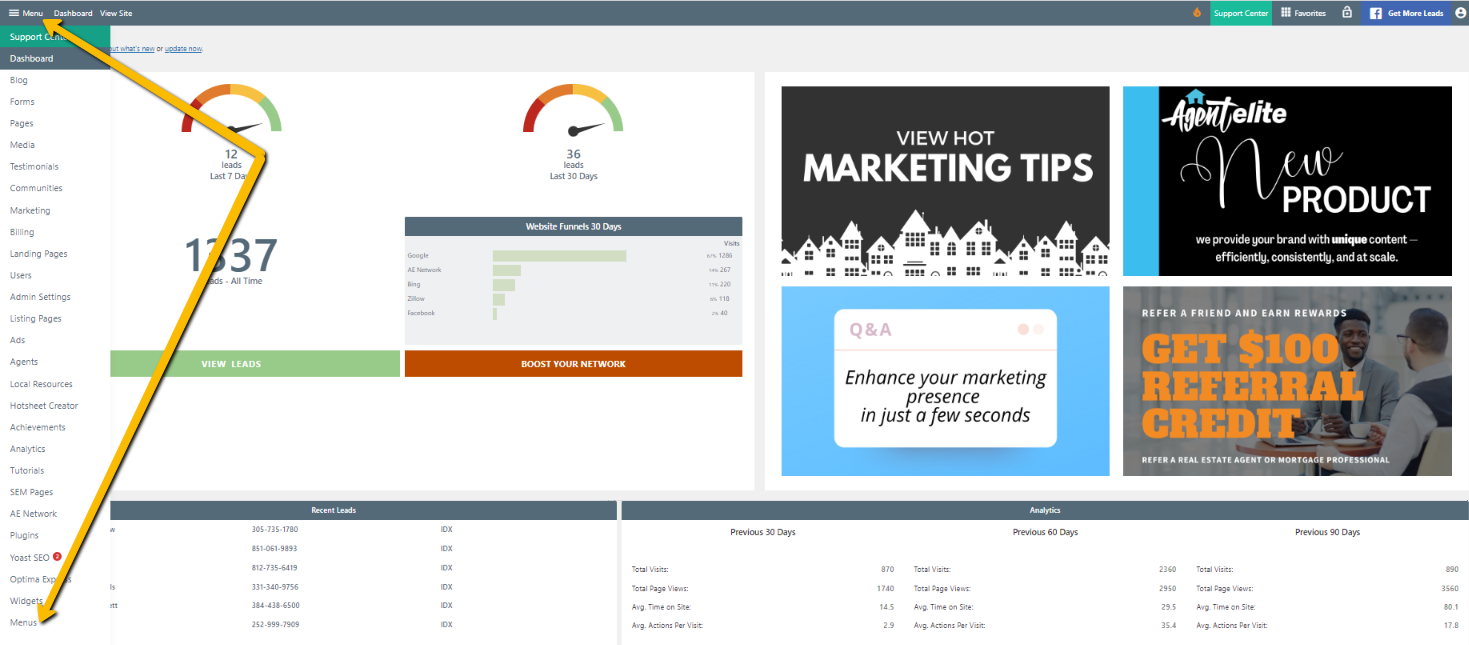
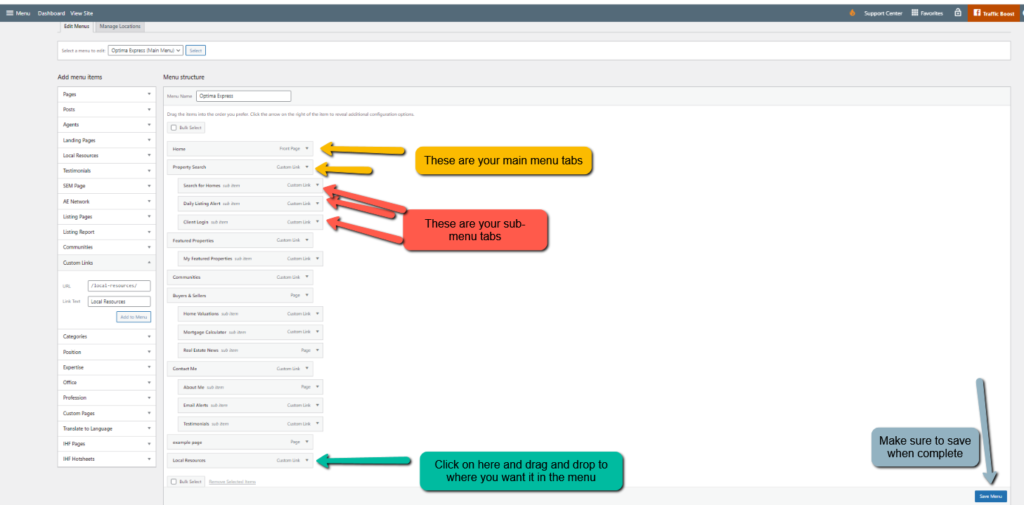
From the Website Dashboard, click on Menu and then select Menus.
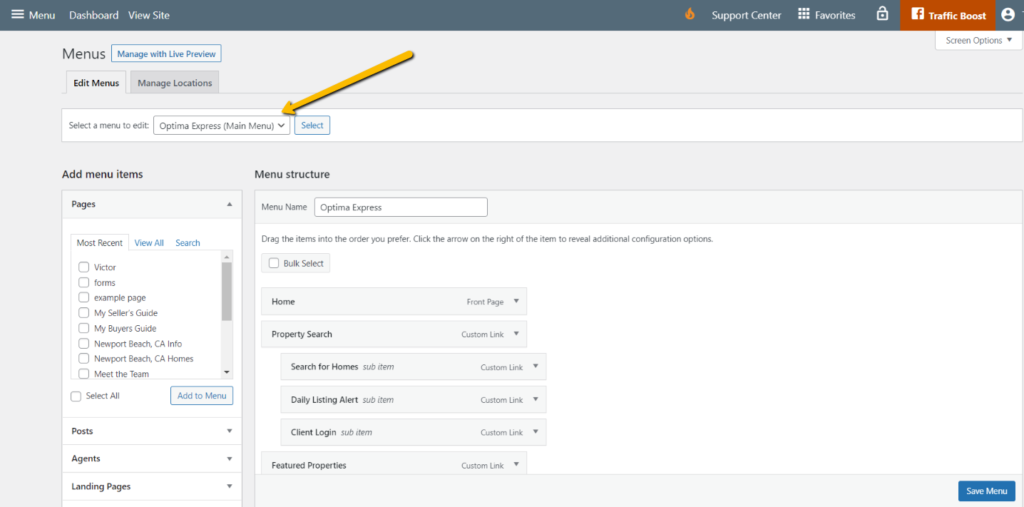
Make sure the Menu is set to Optima Express (Main Menu)
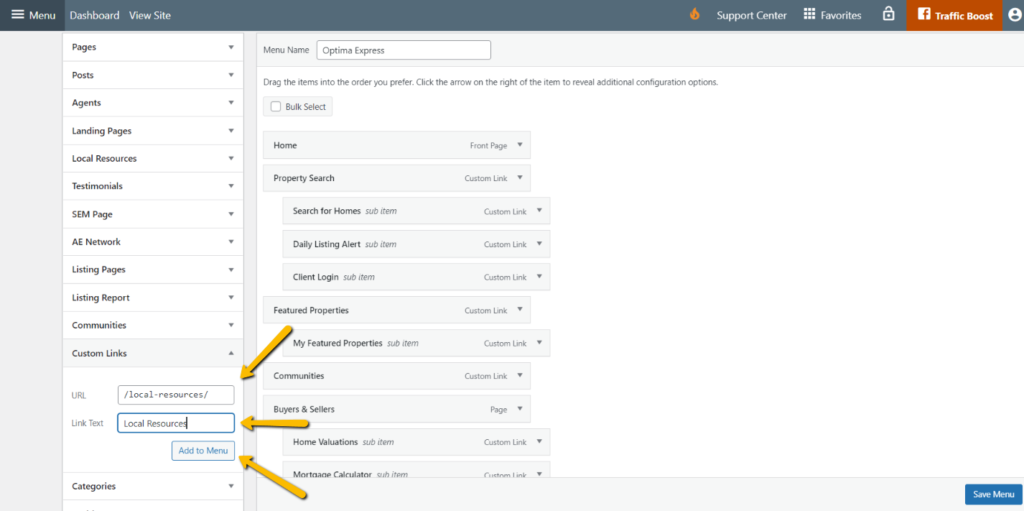
Click on Custom Links, and in Url, type /local-resources/ and then name the page "Local Resources." Click Add to Menu.
The Local Resources tab will be added to the bottom of the Menu Structure. This Menu Structure mirrors the Menu Bar on your website's Home Page. The items aligned to the left are your primary menu tabs, and the indented items are your sub-menu tabs. Click on the Local Resources menu tab under Menu Structure, and drag and drop to where you'd like it located on the menu. Make sure to Save Menu.
Next, go back to Menu and then select Local Resources.

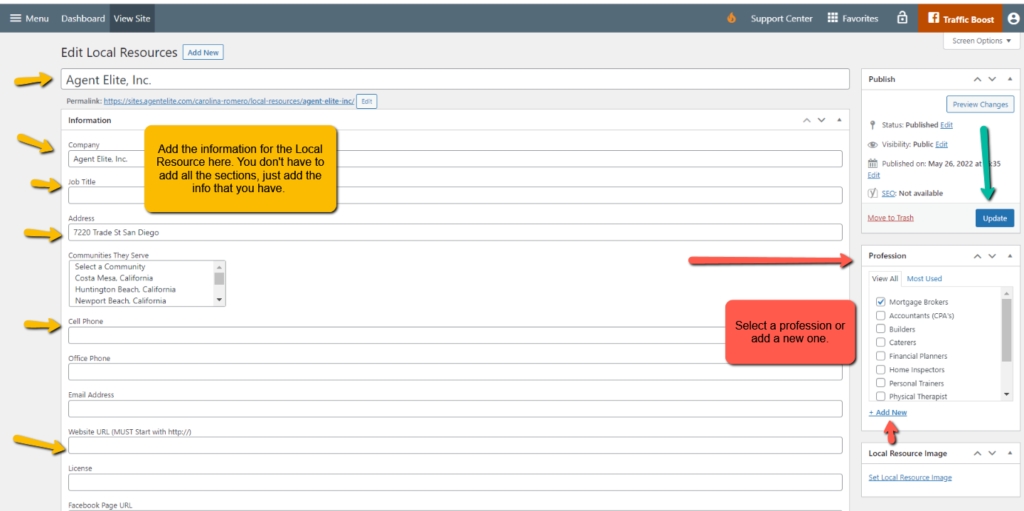
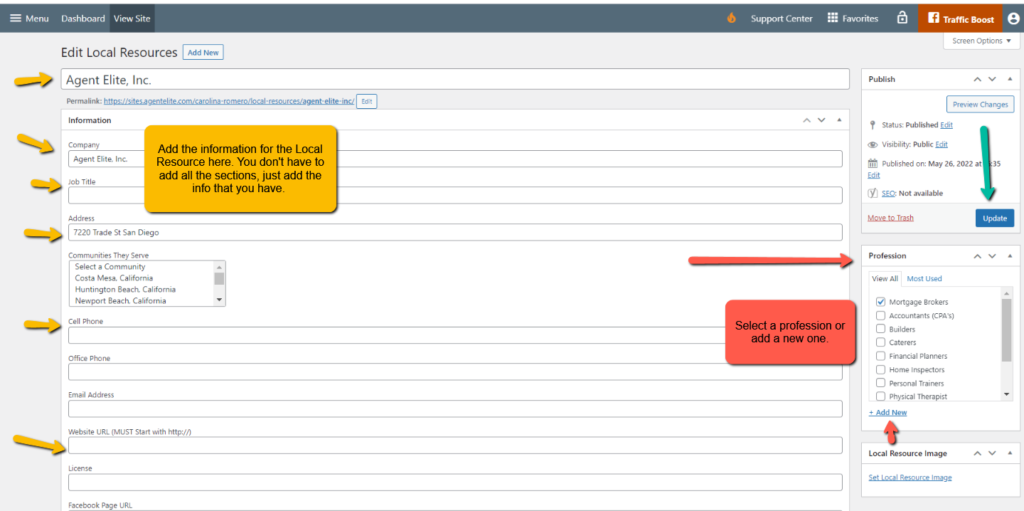
From Local Resources, select Add New and add the info for the Local Resource. You will have to choose a Profession, so if you do not see the one you need listed, you can add more. Make sure to finish by selecting Update.
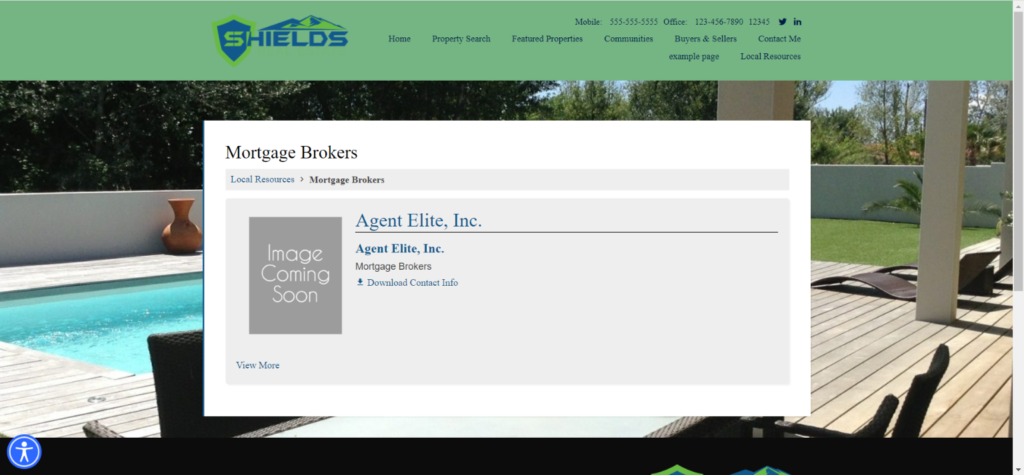
When finished, your Local Resources will be a menu tab and will be grouped by profession.
When your customers click on the profession, they will see a more detailed summary of your Local Resource (you can even add a picture!)
