How do I Add An Agent/Agent Image To My Site?
- Agent Elite University
- My Account
- Agent Elite Max (CRM)
- Design Studio
- Local Presence
-
Website
Real Estate Specific (Click here for a full list of articles) Email Marketing Automation and Integration (Click here for a full list of articles) Integrations Landing Pages Single Property Websites & Flyers Blogs Mortgage Specific (Click here for a full list of articles) Analytics IDX Search Engine Optimization (SEO) Team Marketing Automation
- Facebook Ads
Table of Contents
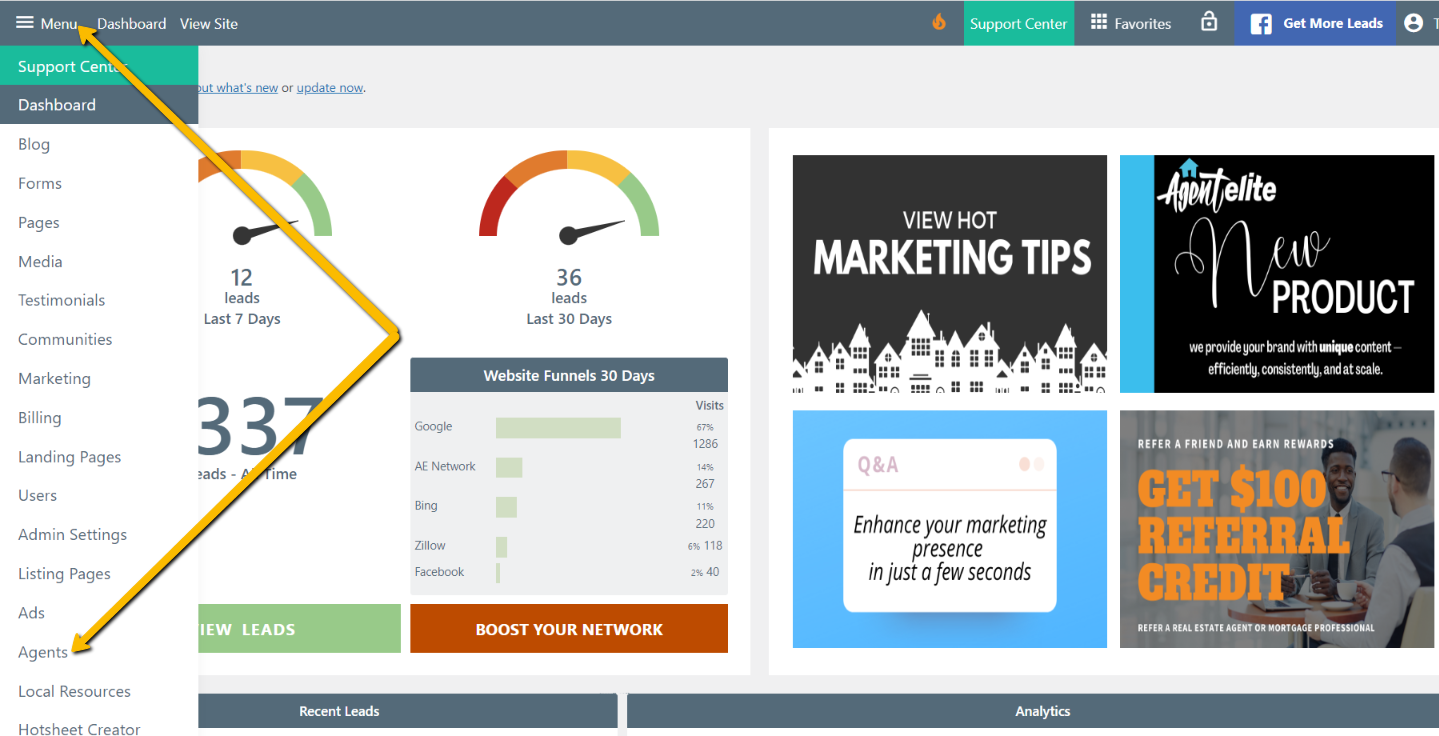
Log into the back end of your website, go to Menu on the top left and click on the Agents link.

On the agent's page, click on the button that says Add New.

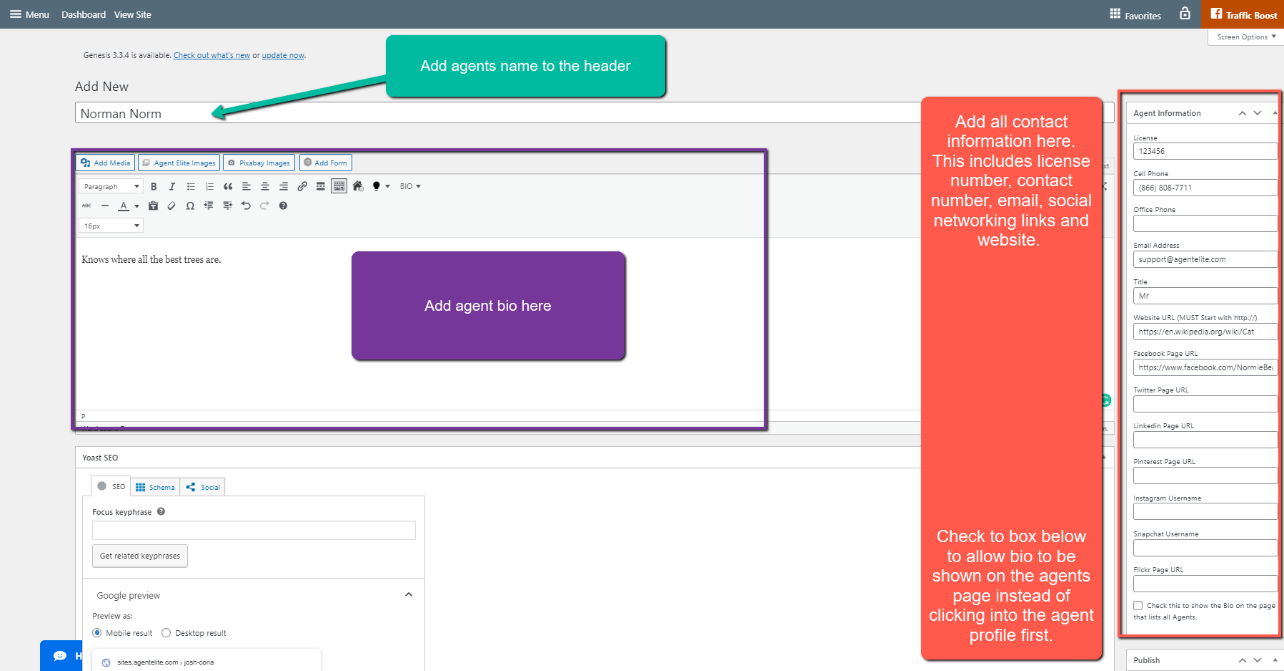
Once you click on Add New, this will open the customizer/page editor. For the page title, label this with the agent's name. Add a bio to the text editor of the page editor and all contact information to the top right side of the page editor. This includes license #, phone number, email, and social networking.

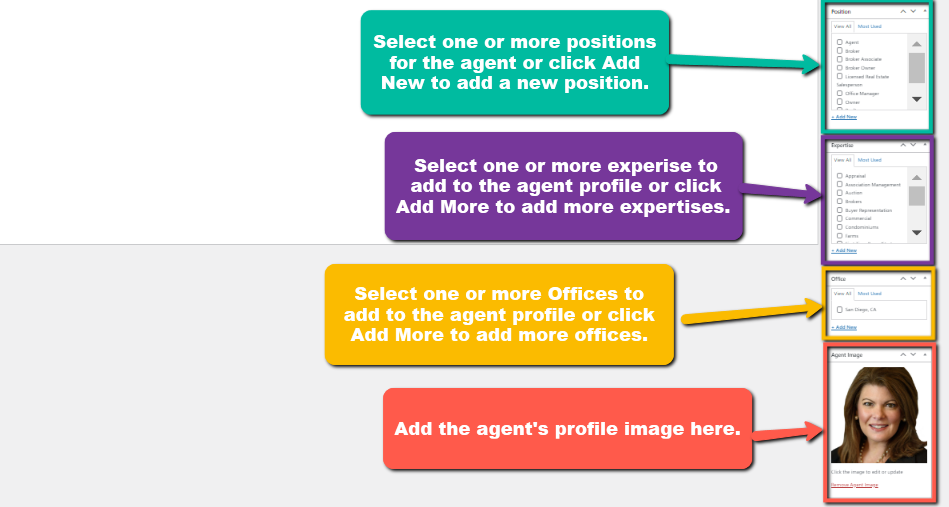
On the lower right side, you have options to check one or more selections for Positions, Expertise, and Office. You can upload the agent image at the very bottom of the page.

Once completed, in the right middle section, you will see the box that says Publish/Update.

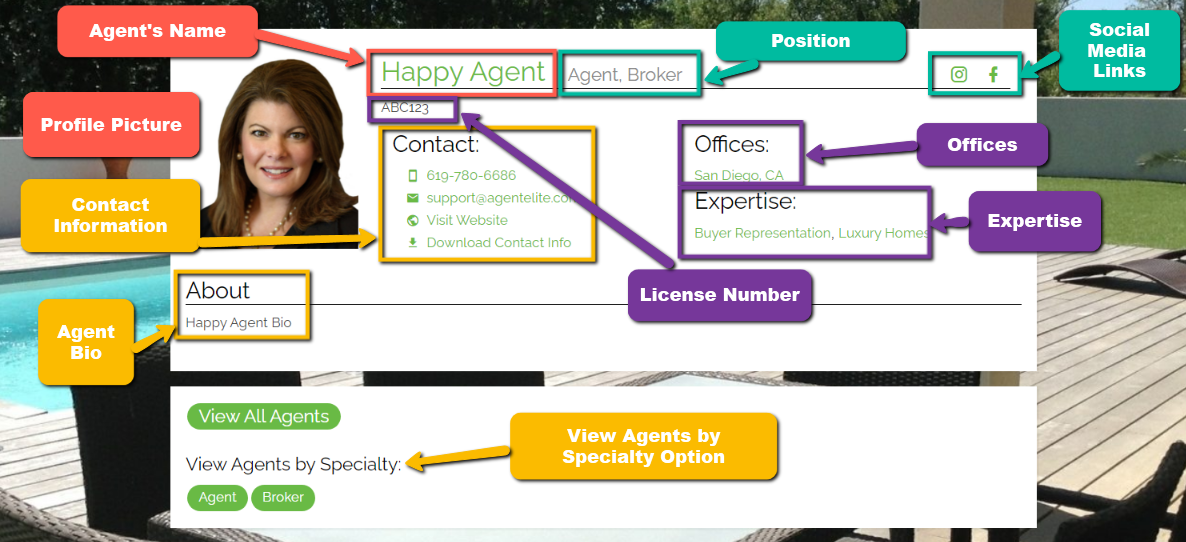
Once you have saved your changes, all your agents will be listed on the Agents page.

On the agent's page, you will see all the agents information displayed. Please see the screenshot below to see how each piece of information is placed.
