How To Adjust Marketing Automation Rules (Turning Your Drip Campaigns On and Off)

Written by Jenna Tighe
Updated at December 7th, 2022
- Agent Elite University
- My Account
- Agent Elite Max (CRM)
- Design Studio
- Local Presence
-
Website
Real Estate Specific (Click here for a full list of articles) Email Marketing Automation and Integration (Click here for a full list of articles) Integrations Landing Pages Single Property Websites & Flyers Blogs Mortgage Specific (Click here for a full list of articles) Analytics IDX Search Engine Optimization (SEO) Team Marketing Automation
- Facebook Ads
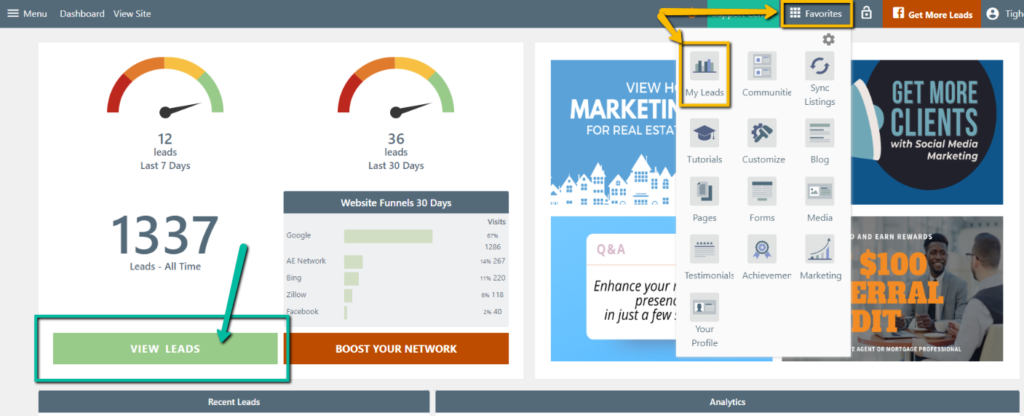
From the website dashboard, click View Leads on the left or select My Leads from the Favorites waffle icon.
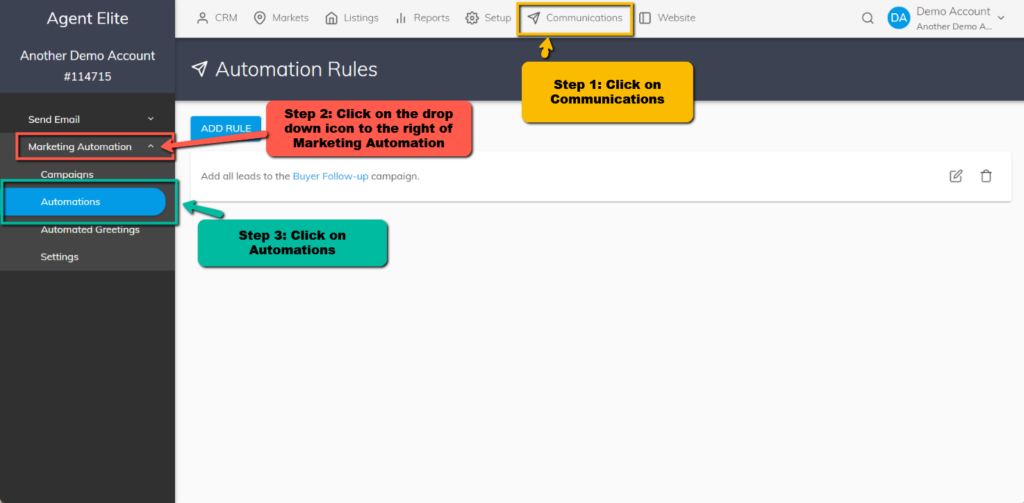
Click on Communications, click on the drop-down icon next to Marketing Automation, and then click on Automations.
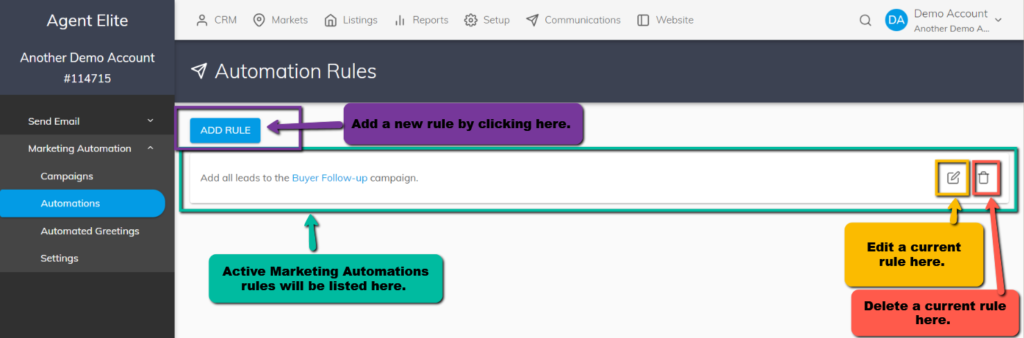
If you have any marketing automation rules already in place, you will see them here. To add a new rule, click on Add New. To delete a rule, click on the trash icon.
When adding a new rule, you will see the following prompt:
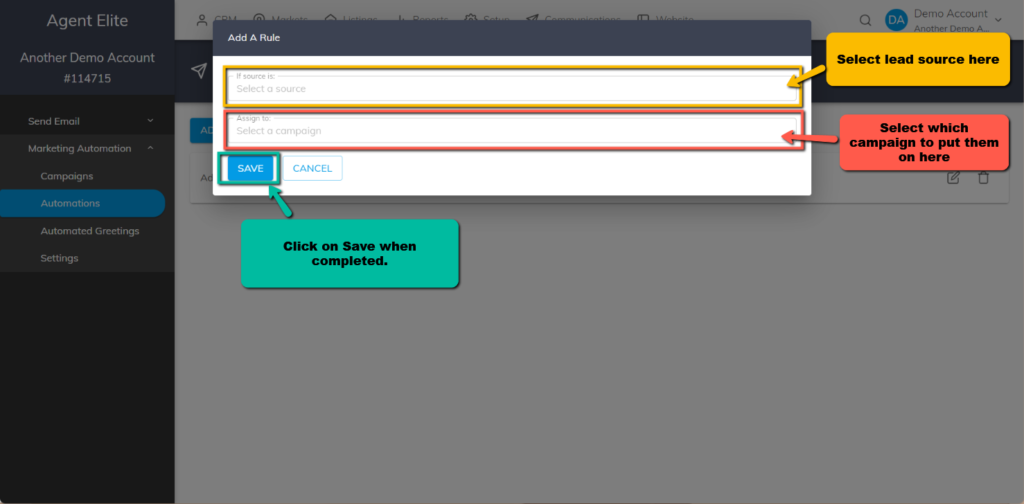
Select a lead source, then select the campaign. Click on Save to complete.