How To Use the Polygon Map Search Tool
- Agent Elite University
- My Account
- Agent Elite Max (CRM)
- Design Studio
- Local Presence
-
Website
Real Estate Specific (Click here for a full list of articles) Email Marketing Automation and Integration (Click here for a full list of articles) Integrations Landing Pages Single Property Websites & Flyers Blogs Mortgage Specific (Click here for a full list of articles) Analytics IDX Search Engine Optimization (SEO) Team Marketing Automation
- Facebook Ads
The Polygon map is a great alternative when you need to specify a particular area not defined in your MLS. You can easily create a market using the custom map maker.
From the website dashboard, click on the green View Leads bar to access your CRM.

Click on Markets at the top.

Click Add a Market.

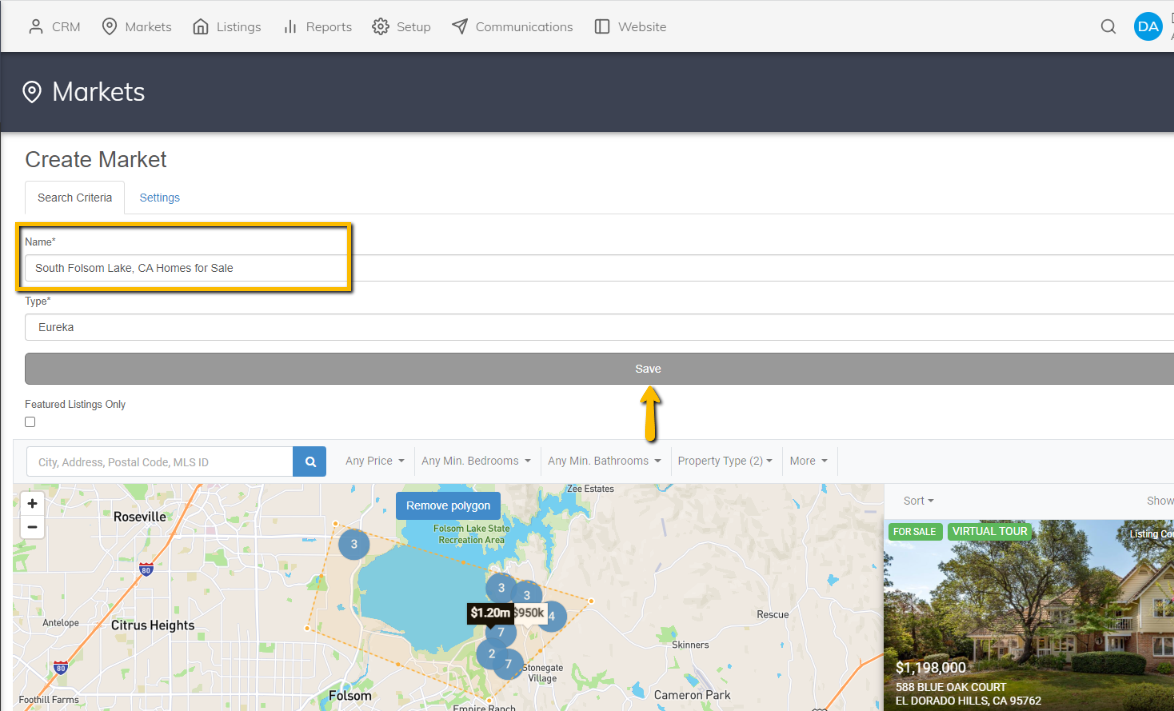
Let's say you want to create a market that shows only listings on the south end of Folsom Lake, but your MLS does not have that as a defined area. You can use the polygon tool to draw a custom map.
Click once on the Polygon tool icon. Your cursor will now turn into a hand icon.

Use your mouse to place the hand icon where you want the map to start. Click once, and a pin will drop at that location. This pin begins your map. You can now draw the map with your mouse icon. Clicking your mouse icon as you draw the map will allow you to create a border.
To complete the map, click on the original spot where you started your map. You will now see the map you drew and all the listings within that area.

If you want to adjust your map, click inside of it and drag and drop to where you'd like it.
After drawing your map, please give it a name and click Save.

You are now ready to connect your market to a community!