
Creating AI Blog Posts
The AI Blog Post Generator creates full-length, SEO-friendly blog posts for your website in minutes, without you writing a word. It writes in your own voice (from your AI Interview), uses live market data from your IDX markets, and adds local research from the web. When the post is ready, you can publish it straight to your WordPress site, live or as a draft, from the Max mobile app.
Regular blog posts help you:
- Rank in local real estate searches and get found by new leads through Google and AI-powered search tools
- Build a library of local content on your website that shows you know your market
- Do all this without needing SEO knowledge or writing skills
Because posts use real MLS data from your IDX markets, they include local numbers that generic AI tools can’t.
Before you start
Section titled “Before you start”To create blog posts, you need:
- The latest version of the Max mobile app (iOS or Android). Blog posts can’t be created from the Control Panel yet.
- A completed AI Interview. The interview builds the voice profile that the AI uses to write in your style. Until it’s done, the home screen shows a card asking you to complete it.
- The admin role, if you’re on a team account. On multi-agent accounts (Max Pro Teams, Lead Maximizer multi-seat and Growth Pro multi-seat), only admins see the blog post option.
To publish directly to your website, you also need the Optima Express plugin updated to the version that supports blog publishing. See Connecting to WordPress.
Step 1: Choose a post type
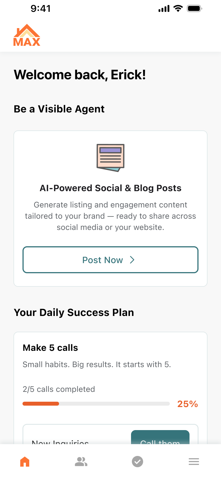
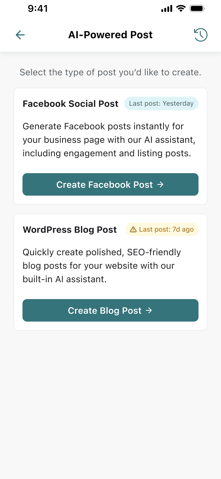
Section titled “Step 1: Choose a post type”On the home screen, tap Post Now on the AI-Powered Social & Blog Posts card. Then choose the type of post:
- Facebook Social Post creates a post for your Facebook Business Page.
- WordPress Blog Post creates a long-form blog post for your website.
This screen also shows when you last posted each type. Tap Create Blog Post to continue.
Step 2: Choose a topic
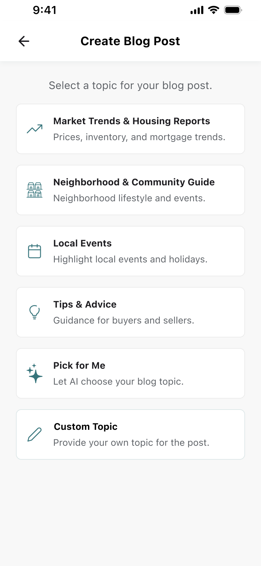
Section titled “Step 2: Choose a topic”Pick one of six topics for your post:
| Topic | What it creates |
|---|---|
| Market Trends & Housing Reports | A data-driven post about your local market, using live figures such as median price, inventory, days on site and active listings. You’ll be asked to choose one of your IDX markets. |
| Neighborhood & Community Guide | An evergreen guide to a neighborhood or area, aimed at buyers searching “what is it like to live in…”. You can choose a market to include, or continue without one. |
| Local Events | Describe a local event or holiday (for example, “New Year’s events in Eugene, OR”) and the AI writes a timely local post. |
| Tips & Advice | The app picks a helpful topic for you, such as buying or selling tips, first-time buyer guides, seasonal checklists, home staging or investment tips. It avoids topics you’ve already posted about. |
| Pick for Me | One tap: the app chooses the best topic across all categories, based on the season, your market data and what you haven’t covered yet. |
| Custom Topic | Describe your own topic (for example, “Interior decorating trends in 2026”) and the AI writes about it. |
Step 3: Preview the post
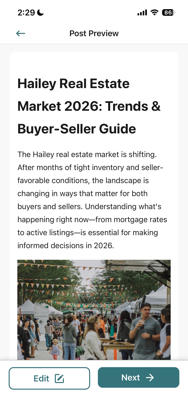
Section titled “Step 3: Preview the post”The AI writes your post while a loading screen shows, then opens the Post Preview. Each post includes:
- A title aimed at a local search term
- Sections with headings, including question-style headings with direct answers (the format Google’s AI Overviews, ChatGPT and Perplexity like to quote)
- Your contact details in the middle and at the end of the post, linked to your IDX contact page
- Links to your IDX pages, such as your market report and property search
- At least one image from the image bank
Posts are usually 1,000 to 3,000 words, depending on the topic. From the preview, tap Edit to make changes, or Next to move on to publishing.
Step 4: Edit with the AI chat (optional)
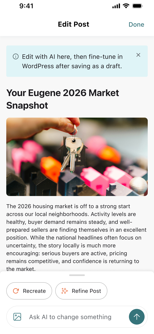
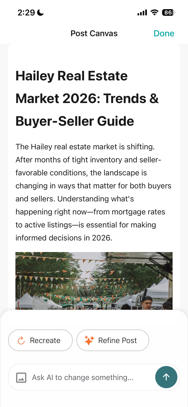
Section titled “Step 4: Edit with the AI chat (optional)”On the editing screen, you change the post by telling the AI what you want in the chat box. For example:
- “Make this sound more casual”
- “Add a section about new construction”
- “Shorten the intro”
- “Can you mention the new restaurant district on Main Street?”
The AI updates the post, keeps your voice, and tells you what it changed. You can also use the buttons above the chat:
- Recreate writes a completely new post from scratch.
- Refine Post makes targeted improvements to the current version.
When you’re finished, tap Done to go back to the preview.
Adding images
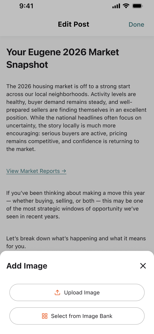
Section titled “Adding images”To add an image, tap the image icon in the chat box and choose Upload Image (from your phone) or Select from Image Bank. You can add one image per message; send another message to add more. For best results, tell the AI where to put it, for example “put this image at the bottom of the blog” or “add this after the section about local restaurants”. You can also ask the AI to move, remove or replace images.
The AI writes alt text for every image automatically, including ones you upload. Alt text describes the image for visitors who use screen readers, which helps your site meet accessibility (ADA) standards. You never need to enter it yourself.
Step 5: Review post details
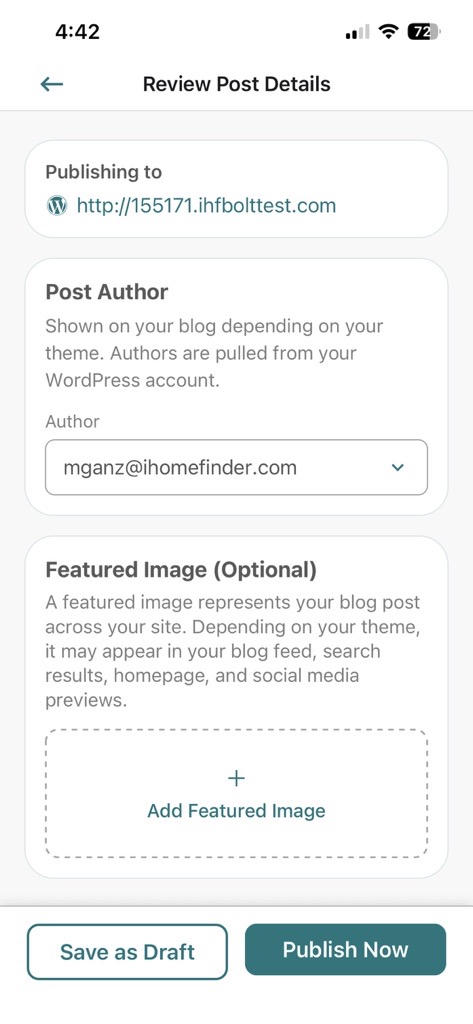
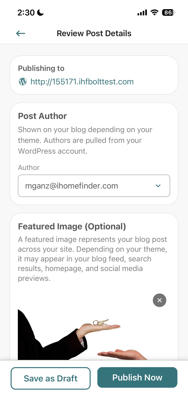
Section titled “Step 5: Review post details”The Review Post Details screen shows:
- Publishing to: your website address
- Post Author: the WordPress user the post is credited to
- Featured Image (Optional): a cover image for the post
Post Author
Section titled “Post Author”Choose which WordPress user the post is credited to. The list shows the users on your WordPress site who can publish posts (usually Authors, Editors and Administrators), plus Optima Express (System Account). Names appear as they’re set in WordPress, so you may see a name, a username or an email address.
If your site has exactly one WordPress user besides the system account, that user is selected for you. Otherwise, the system account is selected. Your choice applies to this post only, for both Publish Now and Save as Draft.
Whoever you choose as the author, your own name and contact details still appear in the post itself. You can change them with the AI chat, or in WordPress after publishing.
Featured image
Section titled “Featured image”A featured image represents the post across your site. Depending on your WordPress theme, it can appear in your blog feed, on your homepage, in search results and when the post is shared on social media. Think of it as the post’s cover image, separate from the images inside the post.
To add one, tap Add Featured Image and choose:
- Select Image from Blog Post: use an image that’s already in the post
- Upload Image: upload one from your phone
- Select from Image Bank: choose from the image bank
A featured image is optional. If you skip it, the post publishes without one, which is fine; not every theme shows featured images prominently. To learn more, see Add a featured image in WordPress.
Step 6: Publish
Section titled “Step 6: Publish”Choose one of the two buttons at the bottom of the screen:
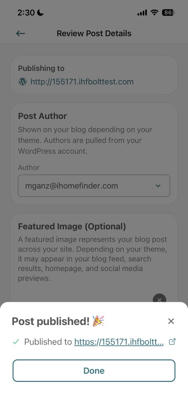
- Publish Now puts the post live on your website straight away. You’ll see a confirmation with a link to the post.
- Save as Draft sends the post to your WordPress site as a draft, which the public can’t see. You’ll see a confirmation with a link to your WordPress dashboard, where you can make final edits and publish. Drafts are saved to WordPress, not to your phone.
Posts appear in WordPress under Posts > All Posts. Either option updates the “last post” date shown in the app.
Fair Housing check
Section titled “Fair Housing check”The AI is built to avoid Fair Housing issues. When it describes neighborhoods, it sticks to objective facts: location, nearby named amenities, property types, price ranges, school district names (not ratings) and MLS data.
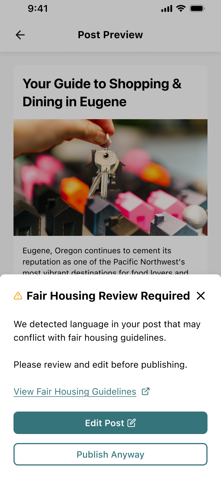
If the AI detects language that may conflict with Fair Housing guidelines, either in the first draft or after a change you asked for, you’ll see a Fair Housing Review Required message when you tap publish or save. It links to Fair Housing guidelines and gives you two choices:
- Edit Post takes you back to the AI chat to make changes.
- Publish Anyway continues publishing.
The message doesn’t point out the exact words, so read the post carefully. Publishing isn’t blocked, and you’re responsible for the final published content.
Automatic market categories
Section titled “Automatic market categories”Posts created from Market Trends & Housing Reports, or from Neighborhood & Community Guide with a market selected, are automatically filed in a WordPress category named after the market (for example, “Bellevue” or “Sun Valley”). This happens for both published posts and drafts, and lets your website show market-specific blog posts on community or neighborhood pages. Posts from other topics aren’t given a market category.
SEO plugin fields (Yoast and AIOSEO)
Section titled “SEO plugin fields (Yoast and AIOSEO)”The post itself is already built for SEO: headings, keyword placement and FAQ-style sections. If you use an SEO plugin such as Yoast or AIOSEO, you can add its settings (like the meta description) in the WordPress editor after publishing. For more on Yoast, see About Yoast SEO.
Connecting to WordPress
Section titled “Connecting to WordPress”There’s nothing to set up in the app. When the Optima Express plugin on your WordPress site is updated to the version that supports blog publishing, it connects automatically. After that, every admin on your account can publish blog posts from the app.
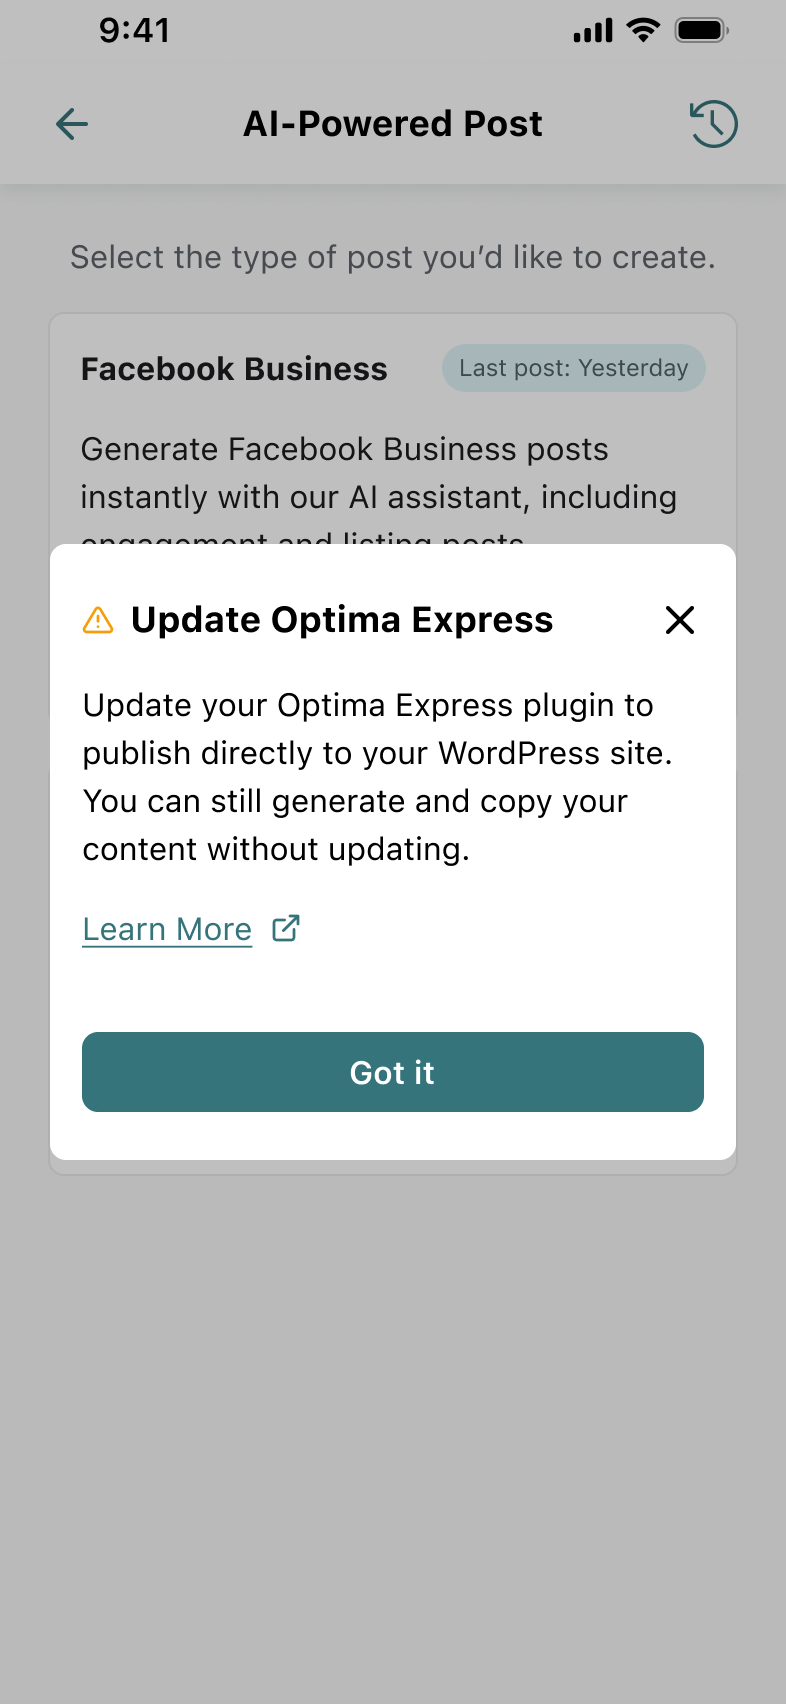
If the plugin hasn’t been updated, the app shows an Update Optima Express message. You can still create posts and copy the content without updating. To update, use the normal plugin update in WordPress (Plugins in your WordPress dashboard), turn on auto-updates, or ask your web developer.
The optima-express WordPress user
Section titled “The optima-express WordPress user”When blog publishing turns on, a WordPress user called optima-express is added to your site. This is a system account, not a real person, and it’s what connects the app to WordPress. It has the Author role, so it can create posts and upload media but can’t change your site settings, themes or plugins.
Troubleshooting
Section titled “Troubleshooting”Publishing fails or nothing happens
Section titled “Publishing fails or nothing happens”Check these in order:
- Update the Optima Express plugin and the Max app. An out-of-date plugin or app is the most common cause.
- Check the optima-express user. If publishing used to work and has stopped, the optima-express user may have been deleted. Follow the Refresh Registration steps above.
- Check that your site allows the WordPress REST API. Some security plugins, hosting settings and firewalls block it, and publishing then fails without an error. To check, open
yourwebsite.com/wp-json/in a browser. You should see a page of raw text. If you see a 403 error, “Access Denied”, a firewall or security page, or a login prompt, the REST API is blocked. Ask your hosting provider, or check your security plugin’s settings, to allow REST API access. We can’t change this from our side.
The post published but I can’t see it on my website
Section titled “The post published but I can’t see it on my website”Go to Posts > All Posts in your WordPress dashboard. If the post is listed, publishing worked, and your site just isn’t showing your blog to visitors. Usually there’s no blog page yet, the blog page isn’t in your menu, or the WordPress “Posts page” setting isn’t set. See Posts page in the WordPress help.
I don’t see the Post Author section
Section titled “I don’t see the Post Author section”If the list of WordPress users can’t be loaded, the Post Author section is hidden and the post is published under the Optima Express system account. You can change the author in WordPress after publishing.
Frequently asked questions
Section titled “Frequently asked questions”Do I need to know anything about SEO? No. The AI handles headings, keyword placement and structure in the post itself.
What if my market doesn’t have much data? The AI uses whatever data is available; there’s no minimum. For a new market with little history, it also uses the market’s name, location, intro text and web research.
How often should I post? We recommend 2 to 4 posts a month for steady SEO growth. The app keeps track of the topics you’ve covered and avoids repeating them, so you can use Pick for Me regularly without getting duplicate content.
What can’t I do yet? At launch, you can’t:
- Type directly into the post (all changes go through the AI chat)
- Schedule a post for a future date
- Create blog posts from the Control Panel (it’s mobile only for now)
- Write a blog post about a specific listing. Listing posts for blogs are coming soon; you can already create listing posts for Facebook in the social post flow.
Can non-admin agents on a team account create blog posts? Not at launch. On multi-agent accounts, only admins can create blog posts.