Pages, contact information and testimonials
Page Overview - Short Code
Section titled “Page Overview - Short Code”Access the Short Code feature by navigating Menu → Pages in your website dashboard’s upper left corner. Select the page to which you want to add the Short Code.
To access the Short Code, click on the dropdown next to the lightbulb icon.

Iframe
Use this tool to insert pdf files and web pages directly into a page.
URL must be the entire URL including https://

If you insert a URL in your iframe and it comes out like the image below, this is most likely due to the domain permissions. That means the domain owner restricted their site from being displayed in an iframe. If you would like, you can reach out to the domain owner to request that they allow it or link the URL instead of framing it.

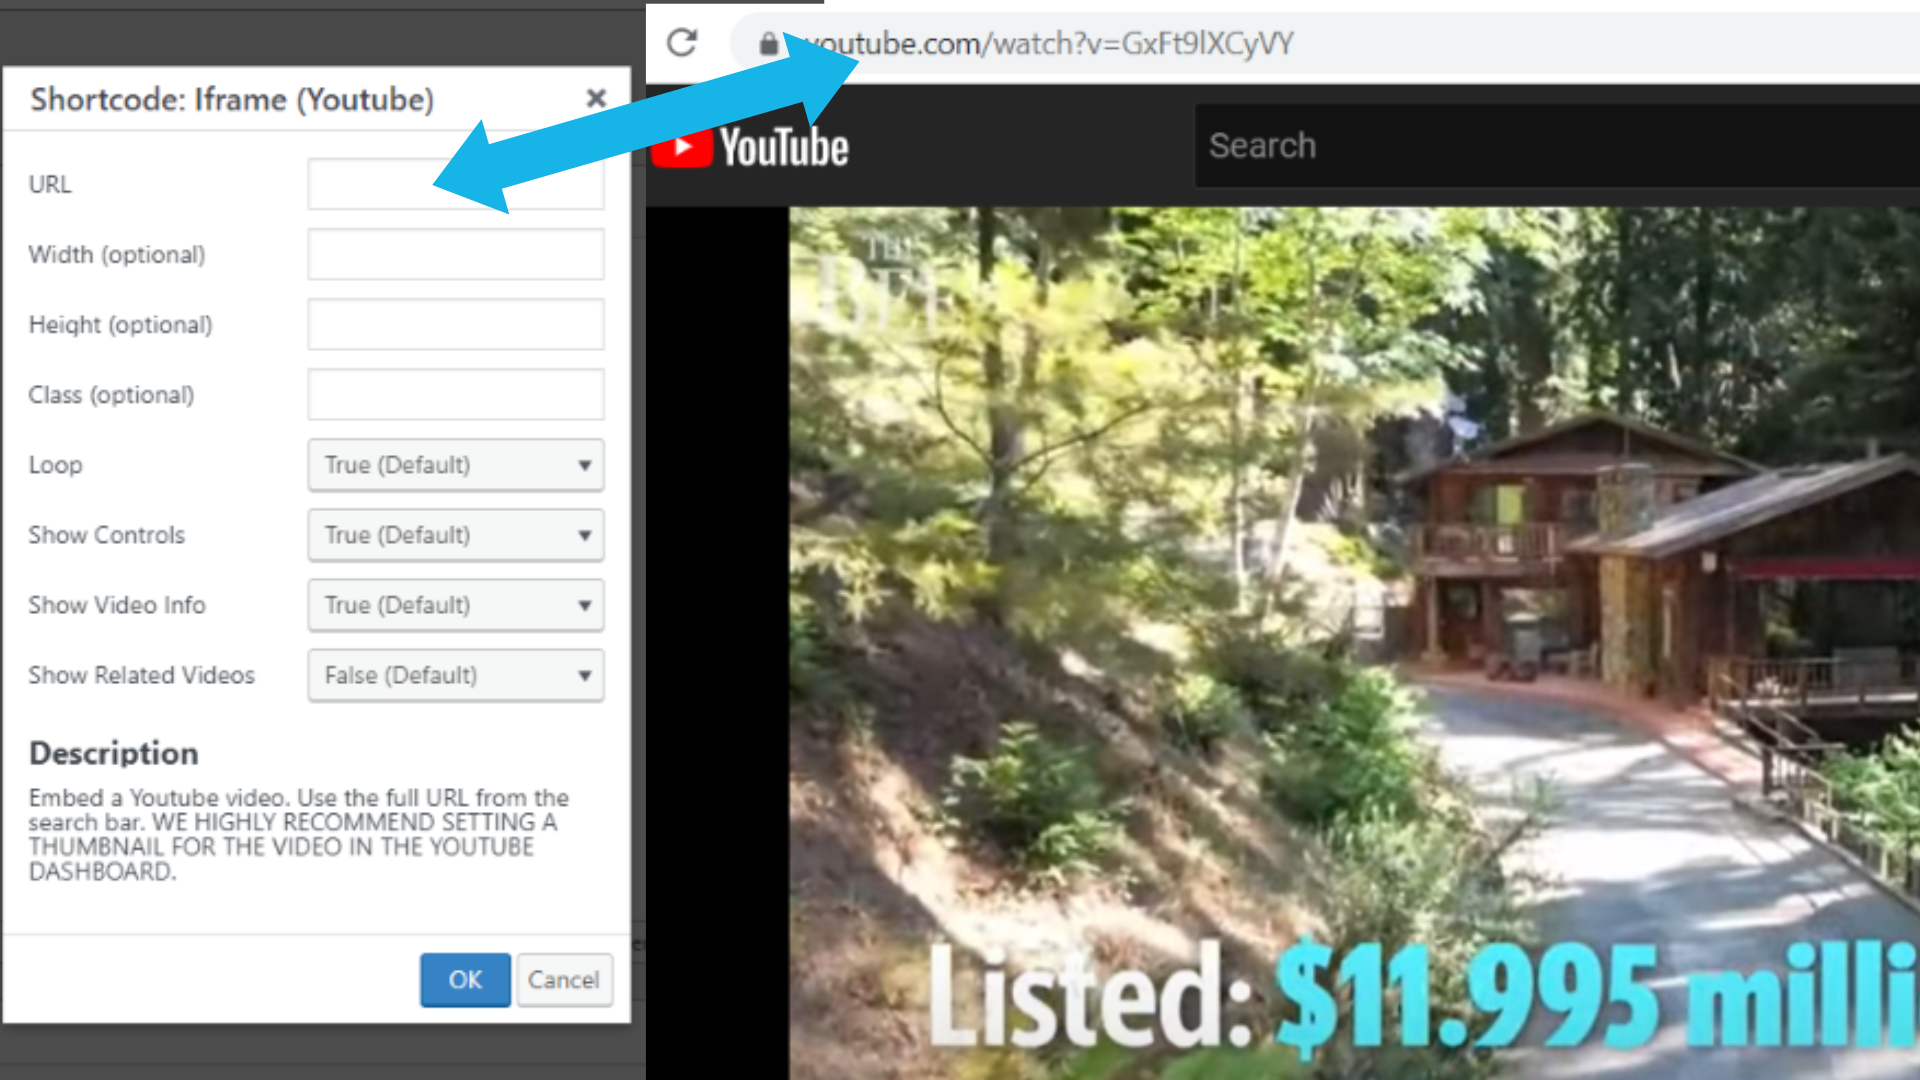
Iframe YouTube video
To add a YouTube video to your site, copy the YouTube URL and paste it into the URL box. You can change the controls to your liking as well through the settings.
FaceBook Widget
Use this tool to add a FaceBook widget to your page. Leaving the FaceBook Page URL empty will grab the FaceBook URL already connected to your website. If there is none, then it will show up blank. Suppose you paste a FaceBook URL in there. In that case, it will override the one connected to the website and use the FaceBook URL entered instead.

RSS Feed
Use this tool to add blogs to your site through an RSS Feed. Leave Max blank to show all blog posts.

Recent Posts
Use this tool to add your most recent blogs through the blog section of the dashboard to your page.

Show Post From Category
Use this tool to display your communities on your page.

Form Pop Up
Use this tool to add a clickable popup form to your site. See below to see an example.

ONE (The text of the link in the content)

Two (The title for the top of the popup)
Three (You can prefill the form message with text)

Mortgage Calculator Sliders

Use this tool to insert a mortgage calculator onto your page. See below for an example.

School Info

Use this tool to add a school map to your page. See below for an example.


Resources
Use this tool to display resources/blogs based on the location.

Default Search
Use this tool to insert a map search defaulted to one of the Property Types provided (selection varies by MLS board)

Walk score
Use this tool to insert a walk score based on the area on your page.


Update Your Contact Information On Your Site
Section titled “Update Your Contact Information On Your Site”There are two places to update your Contact Information on your website.
#1. From the website dashboard, click on Menu in the upper left corner, then select Agents.

Click on the name of the Agent you want to edit
On the right side, update the contact info you want to add/change.

Scroll down on the right, and select either Update or Publish.

#2. Click the waffle icon for Favorites in the upper right corner, then select Customize.

Click on Company Information.

Scroll down on the left and add/change the Contact Information. Make sure to click on Publish when finished.

Adding Testimonials To Your Website
Section titled “Adding Testimonials To Your Website”Accessing the Testimonials
From the Website Dashboard, click Menu in the upper left corner and select Testimonials from the dropdown.

Add a New Testimonial
Section titled “Add a New Testimonial”Select Add New.

Fill in the necessary fields and click Publish to complete.

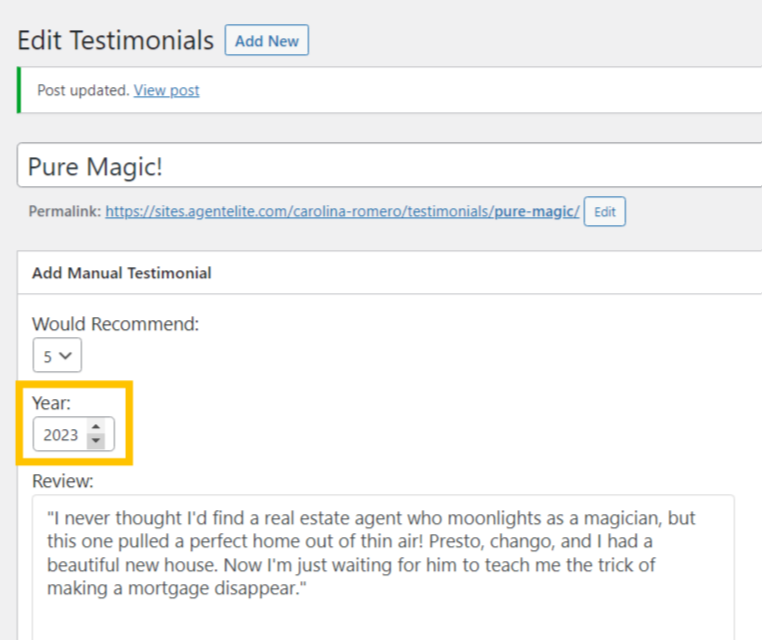
Backdate a Testimonial
If you add a Testimonial from another source and want to backdate the year, you can do so from here. Click Update to save any changes.
Publish a Pending Testimonial
Hover over the testimonial name and select Edit.

Click Publish on the right.

Unpublish a Live Testimonial
From the Testimonial page, click Edit to the right of Published, and from the dropdown that appears, select Draft. Click Okay and Update to save the changes.

Add Zillow Testimonials
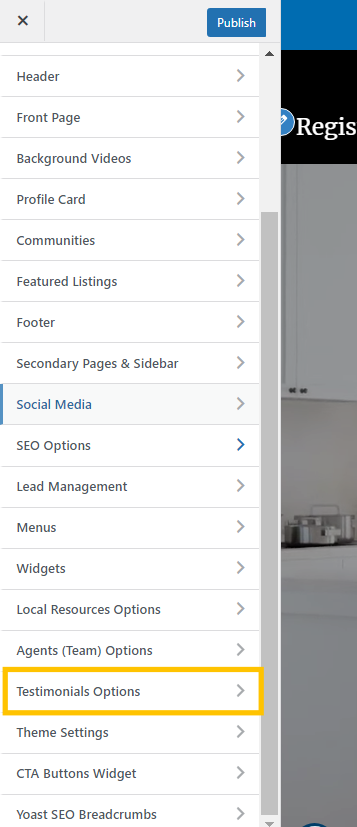
Section titled “Add Zillow Testimonials”From the Website Dashboard, click on the Favorites waffle icon and select Customize.

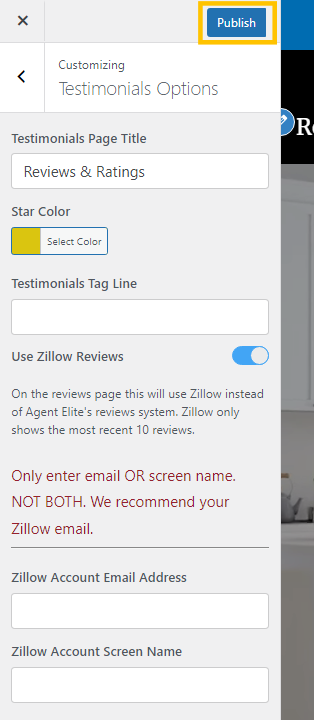
Select Testimonials Options from the left.
Select Use Zillow Reviews.
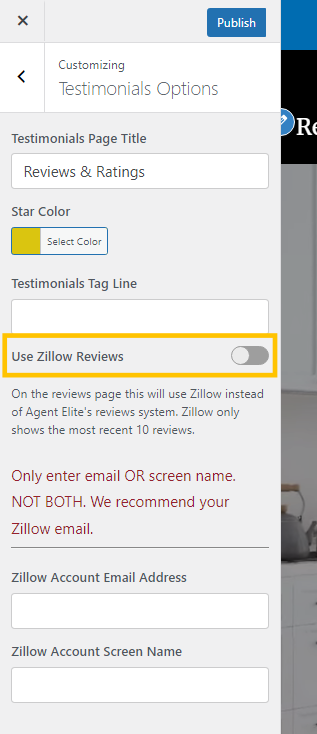
Only enter your email OR screen name. NOT BOTH. We recommend your Zillow email.

Click Publish to complete.