
Adding and importing leads
Max Basics - Manually Adding a Lead in the CRM
Section titled “Max Basics - Manually Adding a Lead in the CRM”The video tutorial provides step-by-step instructions on how to add a lead to your CRM. First, you need to access your CRM, which can be done by clicking on the “Leads” tab at the top of the screen.
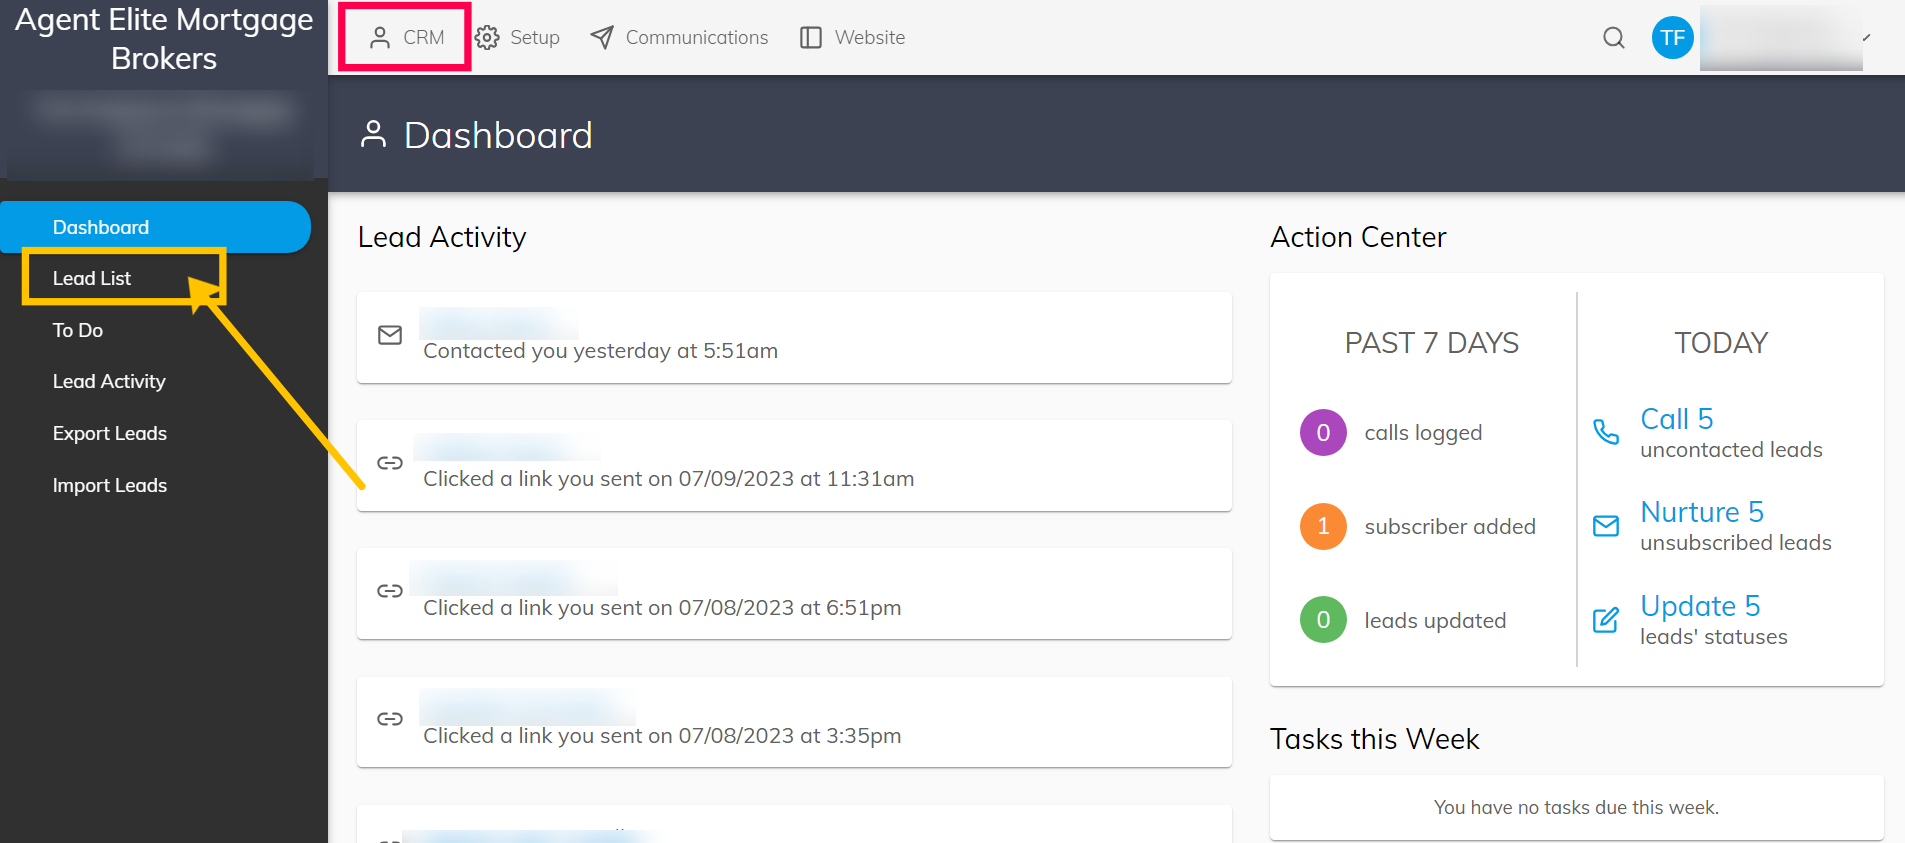
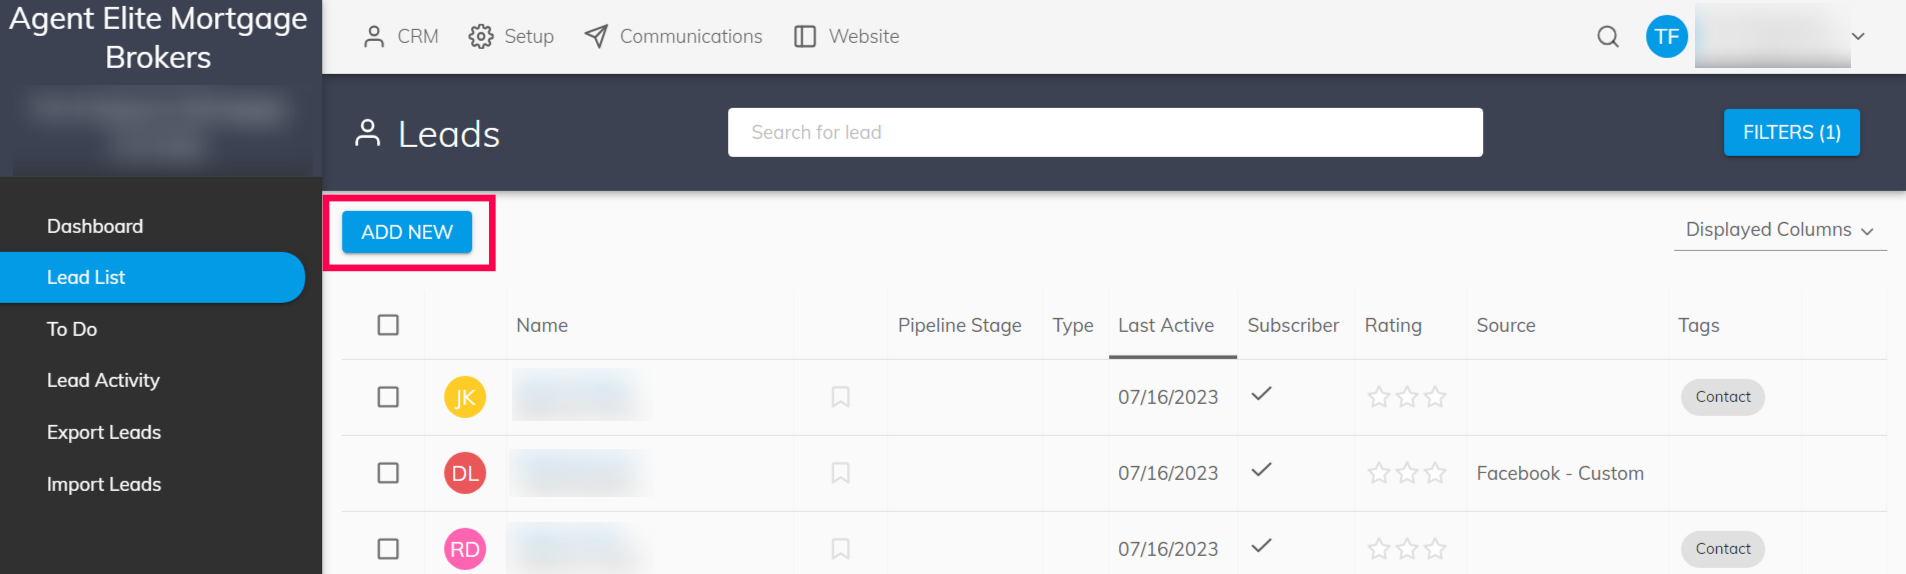
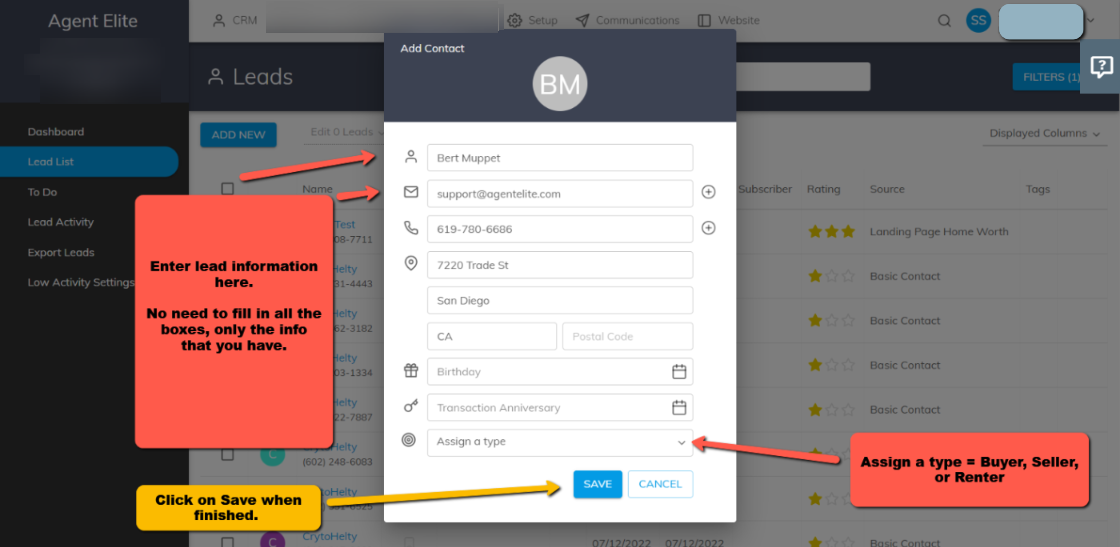
Once inside the control panel, navigate to the lead list by clicking on the left sidebar. At the top of the screen, select the “Add New” button. After that, you will need to fill out the customer’s information, starting with the name (in this example, Jane Doe), followed by their email address, phone number, and physical address if available.
Additionally, you can enter the customer’s birthday to ensure they receive annual emails on that date, helping you stay top of mind. Finally, choose whether the customer is a buyer, seller, or renter, then click “Save” to add the lead. The video concludes by encouraging users to contact customer service or visit the Agent Elite knowledge base for further assistance.
Step-By-Step Instructions
-
Access the Lead List:
- From the Performance Dashboard go to the Lead List by clicking on it from the left sidebar.
-
Click ‘Add New’:
- At the top of the screen, click the Add New button to begin adding a lead.
-
Enter Customer Information:
- Name: Enter the customer’s name (e.g., Jane Doe).
- Email: Provide a valid email address.
- Phone Number: Add a contact phone number.
-
Add Additional Information (Optional but Recommended):
-
Address: If you have the customer’s address, enter it here.
-
Birthday: Input their birthdate if available.
- This allows the system to send an automated birthday email every year, helping you stay connected with your leads.
-
Skip Transaction Date (If Not Applicable):
- If there’s no specific transaction date, you can leave that field blank.
-
-
Select Lead Type:
- Indicate whether the lead is a Buyer, Seller, or Renter.
-
Save the New Lead:
- Once all the information is entered, click Save to add the lead to your CRM.
Click Lead List on the left.
Click Add New.
Add the lead information, and click on Save to complete.
Your lead is now entered!
Max Basics - Import A CSV file
Section titled “Max Basics - Import A CSV file”Before uploading the CSV, it’s crucial for you to confirm whether Marketing Automation is enabled. This step ensures that we align with your preferences. Please be aware that if the automation is active during the CSV upload, all leads from the CSV will be automatically included in your drip campaign. If this is not your intention, we recommend temporarily turning off the automation, proceeding with the CSV upload, and then reactivating the automations as needed. This ensures a seamless and customized experience for your marketing efforts.
Step #1 At the top of the page click “Communications”

Step #2 On the left hand side of the page click “Marketing Automation”
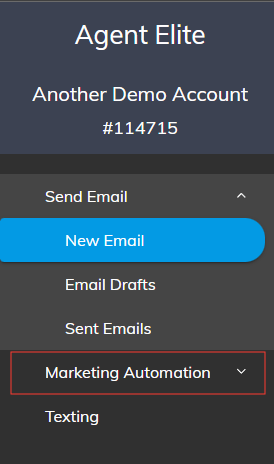
Step #3 On the left hand side of the page click “Automations”
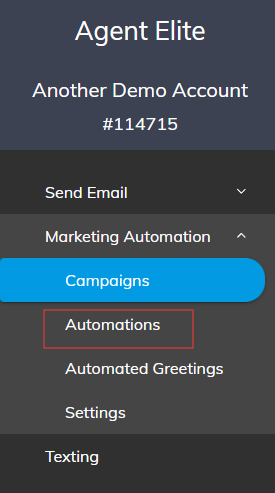
Step #4 Delete any Automation Rule that is currently set
“Please keep a note of the rules that are currently set as they will need to be added back”

After removing all the rules, you can upload the CSV file to your CRM. Once the CSV file is successfully uploaded, reintroduce the “Automation rules” that were initially deleted.
Re-adding Automation Rules
Step #1 On the “Automation Rules” page click “Add Rule”
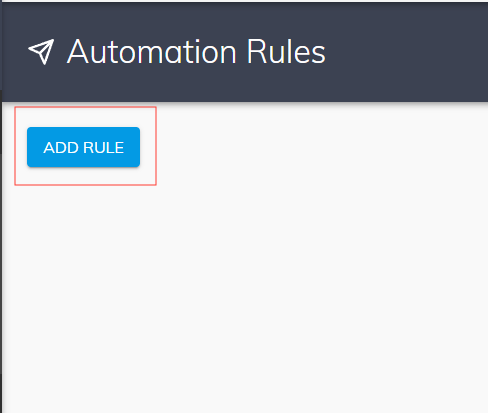
Step #2 Add source to the source field if applicable (If you want all leads to go to the same campaign leave source field blank and select the campaign)
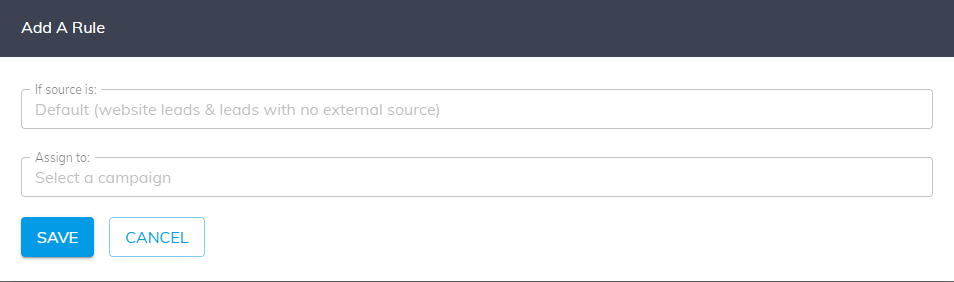
Repeat this process for each automation rule
Once you have the CSV file, open a Google Sheet and click on File → Import and then upload the CSV file.
Formatting the Google Sheet
Mandatory fields
- The Name and Email fields are mandatory to include when importing leads. All the others are optional.
Merging the first and last name fields
You must merge the first name and last name columns into one. To do this, follow these instructions or watch the video below:
-
Insert a new column to the left of the first/last name columns by highlighting the furthest left column with a first or last name, and then right-click and select Insert 1 column left.
-
Click in the top cell of the new column and enter this formula:
-
=concat(B2&” “,C2)
-
Please note
- In this formula, B2 is the column that has the first name, and C2 is the column that has the last name. If the cells on your sheet are different, use the cells that match your sheet’s first and last names.
- There is a space between the two quotation marks.
-
-
Once you enter the formula, hover over the fill handle (the little blue square in the bottom corner of the highlighted cell) until you see the plus sign, and then click and drag the fill handle all the way down to the last row, where you have data entered. The formula will recognize the pattern and auto-fill the corresponding cells with the correct formula.
-
Next, highlight the column you just made and right-click. From the menu, click Copy and then select Paste special → Values only.
-
Your first and last name fields are now merged. Please delete the single first and last name columns.
-
Video on how to merge the first and last name fields
Phone Number Field
Type and Pipeline fields
-
The client can also upload the following fields within these specific parameters:
- Type: Buyer, Seller, or Renter
- Pipeline: Uncontacted, Attempted Contact, Nurturing, Under Contract, Closed YTD
-
Please note - if there are additional parameters present that are not listed above, you will get an error message and have to correct them.
Additional fields
-
Additional fields can be filled in with the lead info. There are no set formatting rules for these fields; however, you will be alerted if something is off and needs to be changed before you can import the leads.
- The alert looks like this:

- This example alerts that the Pipeline column does not have supported parameters, such as Uncontacted, Nurturing, etc.
Column Headers
Please note - The Google Sheet column headers must match the CRM Import Leads headers, or the column will not upload.
For example, if you label the phone field “Phone Number,” it will not upload because it needs to be “Phone.”
Here is the exact wording you need for the Google Sheet Columns:
- Name
- Phone
- Address
- City*
- State*
- Zip*
- Birthday
- Type
- AgentId
- Anniversary
- Pipeline
- Texting
- Tags
- CampaignIds
- MarketIDs
- Note
- Source
Please note - If you have the address all together in one column, that’s fine, it will upload like that as well!
Please see the image below:


Downloading and Uploading the CSV
Download the file as a CSV by clicking on File → Download → Comma Separated Values (.csv).
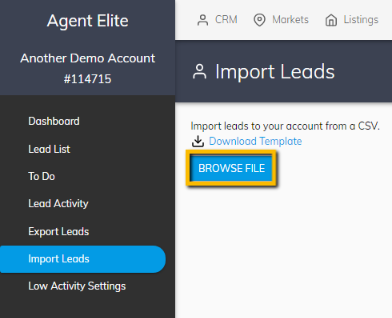
Once complete, go to the client’s CRM and click Import Leads.
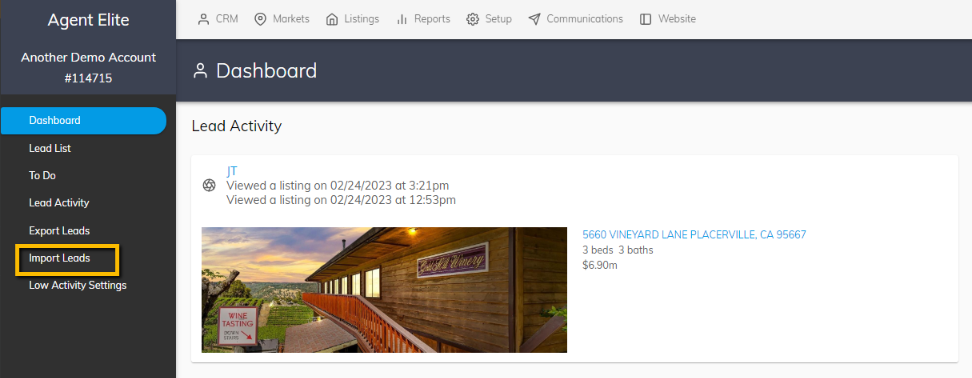 Click Browse File and open the downloaded file.
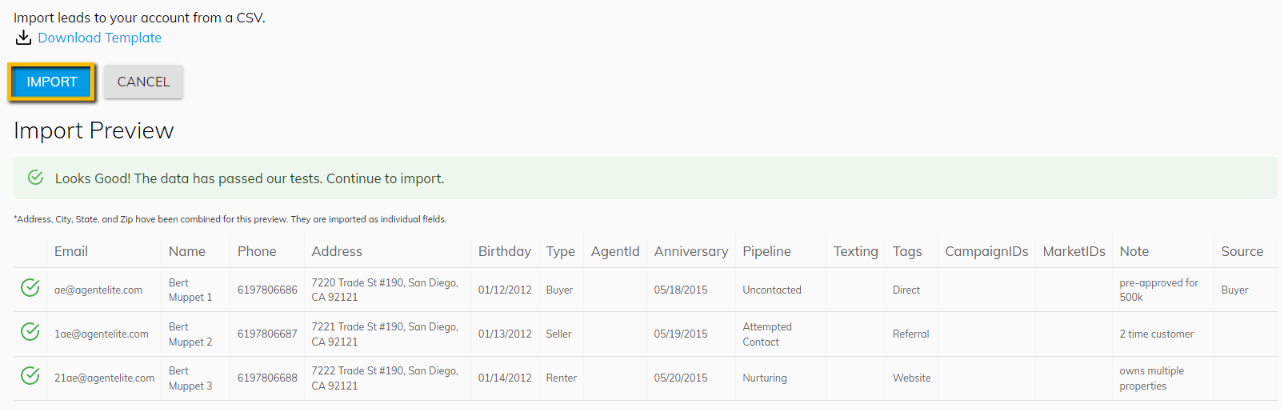
The CRM will alert you here if any of the fields need to have the format adjusted. If so, please modify the formatting and re-upload the CSV. If there are no errors, finish the import by clicking on Import.
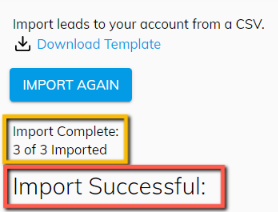
You will be alerted here that the import was a success!
Max Basics - Restoring Deleted Leads
Section titled “Max Basics - Restoring Deleted Leads”This video tutorial walks you through the process of reactivating deleted leads in your CRM. Start by accessing the Lead List from the left-hand column of the Performance dashboard. Once the list loads, remove the active filter by hovering over it and clicking the “X.” Next, scroll down to Status, select Deleted, and click View Leads to display only deleted entries.
In this example, the tutorial searches for a specific lead, Gary Palmer. After locating him in the list, click on his name and scroll down to find the reactivation option. Simply click it to restore the lead.
Once the reactivation is complete, you can return to your regular CRM activities.
Max Basics - Leads Unsubscribing
Section titled “Max Basics - Leads Unsubscribing”Leads can unsubscribe themselves, or you can unsubscribe them.
Leads have the option to unsubscribe at the bottom of every email sent, as required by law.
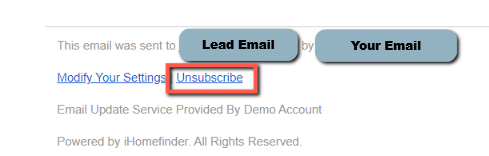
Unsubscribing your leads
You can unsubscribe your leads from drip campaigns in two ways:
- From the drip campaign
- From the lead settings
From drip campaigns
To unsubscribe a lead from a drip campaign, navigate to the Communications tab and select Campaigns from the Marketing Automations dropdown.
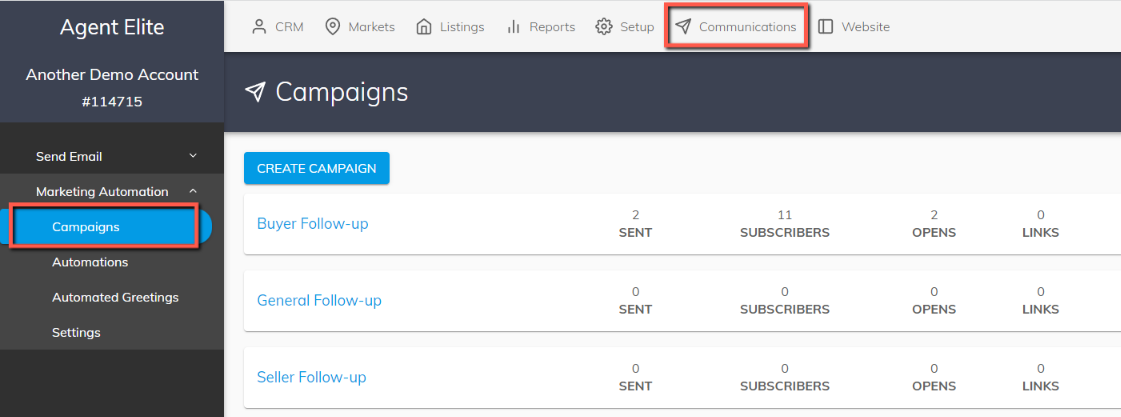
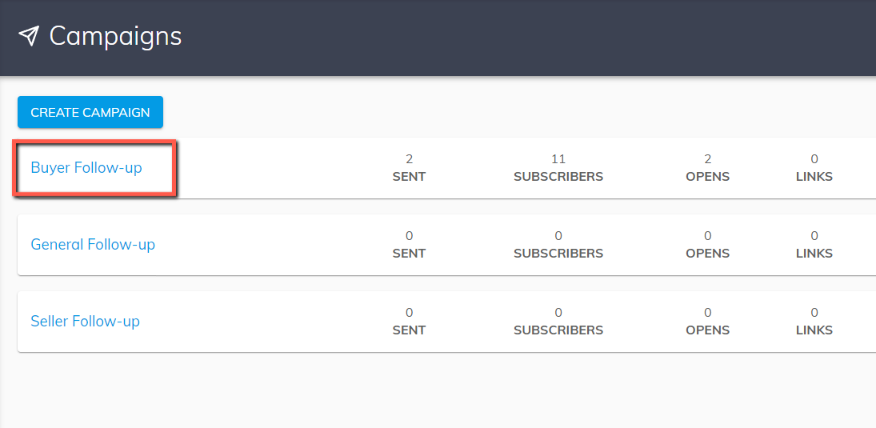
Click on the hyperlink of the email campaign.
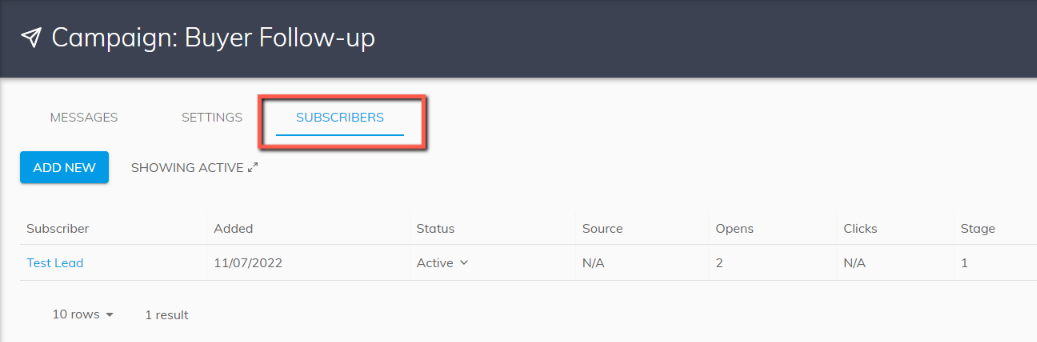
Click on Subscribers.
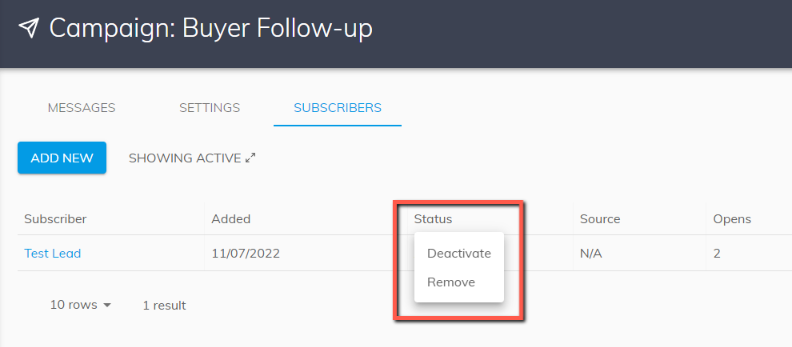
Click on the dropdown next to Active (under Status). From here, you choose to Deactivate the lead from the campaign, which gives you the option to add them back at a later date. Or, you can choose to Remove them from the campaign.
From lead settings (Saved Searches)
To unsubscribe a lead from a drip campaign, navigate to the Communications tab and select Campaigns from the Marketing Automations dropdown.
Click on the hyperlink of the email campaign.
Click on Subscribers.
Click on the dropdown next to Active (under Status). From here, you choose to Deactivate the lead from the campaign, which gives you the option to add them back at a later date. Or, you can choose to Remove them from the campaign.