
Customizing emails
Max Basics - Enhanced Email Communication
Section titled “Max Basics - Enhanced Email Communication”Marketing Automation Campaigns
Marketing Automation allows you to create and send Campaigns, which are a series of scheduled emails that are sent to subscribers over a period of time. You can configure the time that elapses between when messages are sent. This is sometimes called drip email. Learn how to create and manage Campaigns in this section.
Default Campaigns
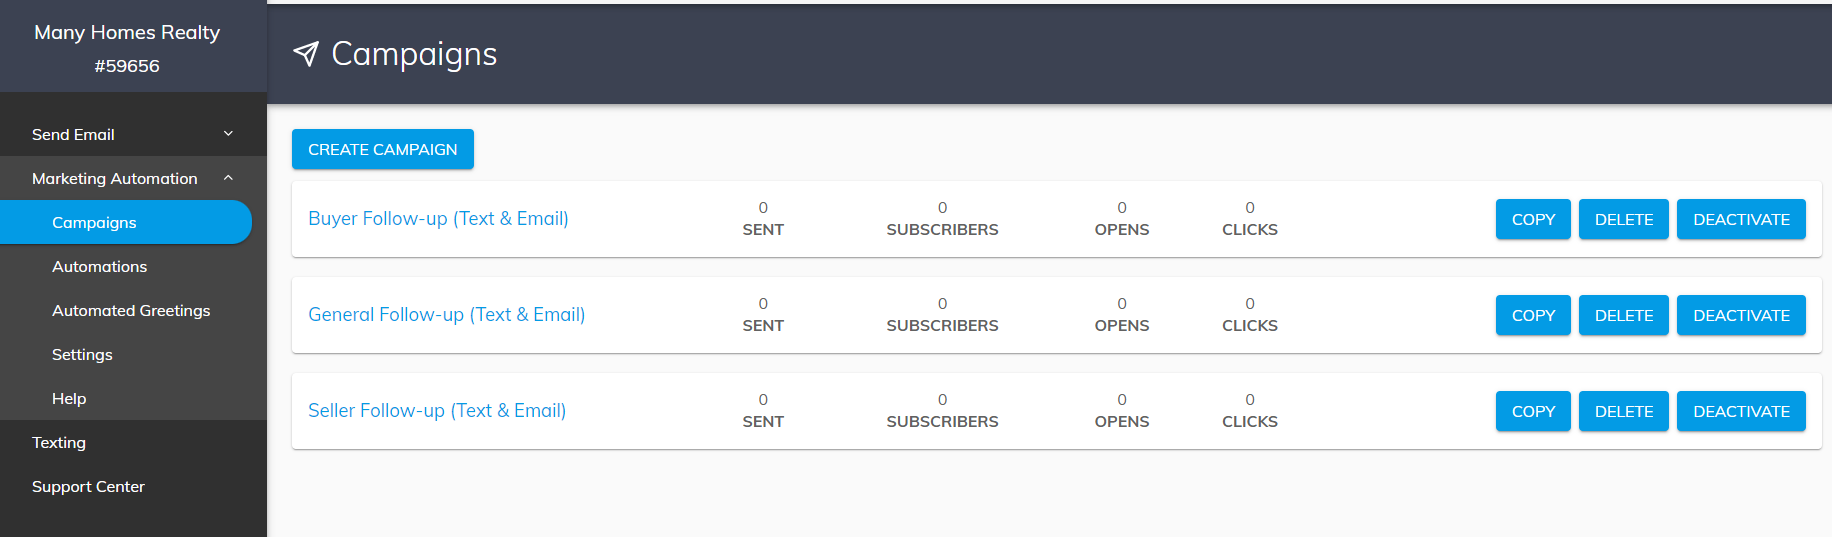
Your account comes pre-loaded with three campaigns to make it easy to start using Marketing Automation. You can send these campaigns as-is, or edit them to suit your needs. The campaigns that will appear by default when you click the Communications button are:
- General - Follow Up
- Buyer - Follow Up
- Seller - Follow up
Creating a Campaign
In the Control Panel, you can create a campaign under Communications > Campaigns and clicking the Add Campaign button.
You will be asked to name your campaign and select the type of smart content to be used. Once you save your campaign, you’ll see it on the Campaign index page. You’re now ready to create and schedule messages.
Copying, Deleting, and Deactivating a Campaign
Click the Action button of a campaign to access the following options.
- Copy - the settings, campaign messages and schedule will be copied into a new campaign called Copy of [original campaign name]. Subscribers are not copied with the campaign.
- Deactivate - pauses the campaign. Messages are not sent while a campaign is deactivated.
- Delete - removes the campaign. If you delete a default campaign accidentally, open a ticket in your User Portal to have it added back.
If you delete a default campaign, open a ticket in your User Portal and we will add the campaign back to your account.
Campaign Settings
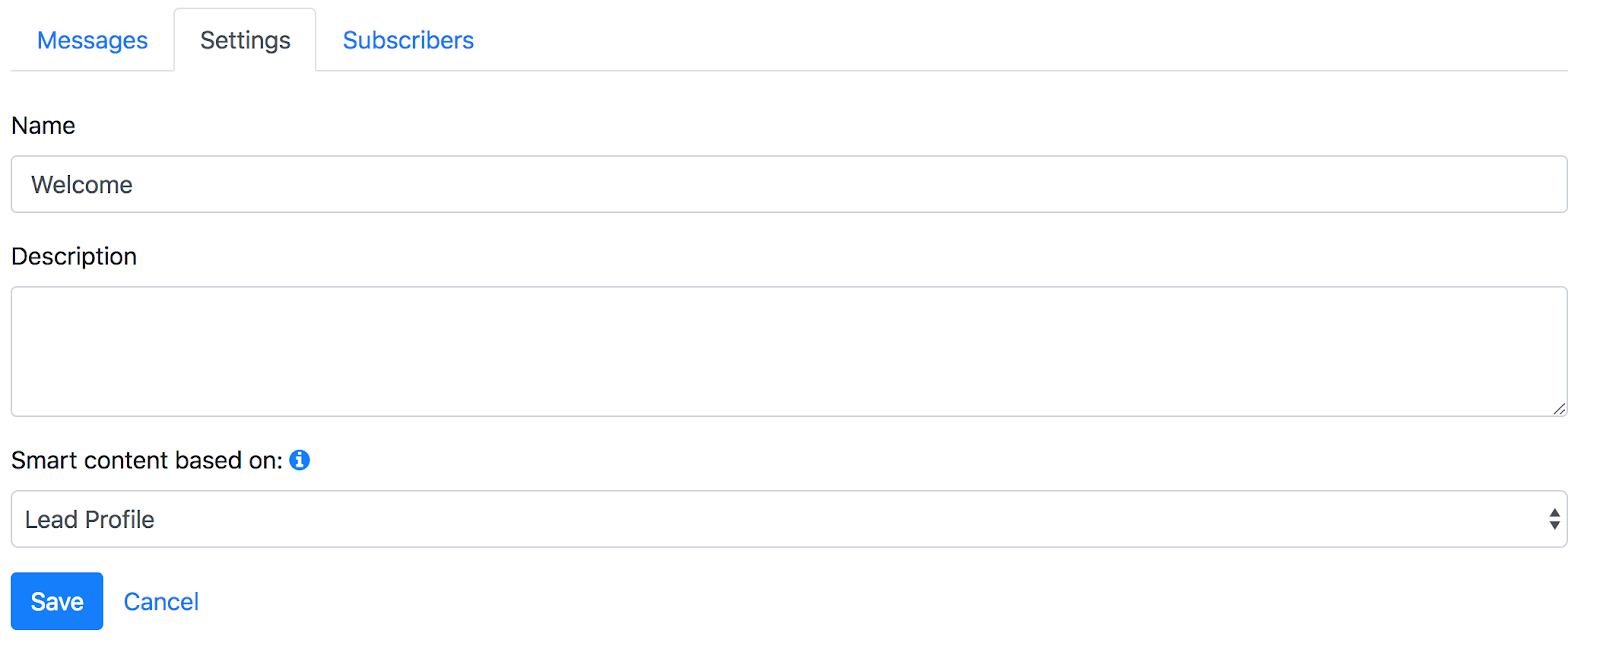
To change the Settings on a Campaign, open the Campaign and select the Setting tab. In the Settings tab edits can be made to Name, Description, and the Smart Content type. When the smart content type is changed for an active campaign with current subscribers, the smart content type in the emails those subscribers receive will be changed with their next message.
Stats on the Campaign page
The campaign page has useful information about the performance of each campaign.
- Sent - how many messages have been sent
- Subscribers - the number of leads active on this campaign
- Opens - the percentage of emails that have been opened by subscribers
- Clicks - the percentage of subscribers who have clicked links in the messages
Text Marketing Automation
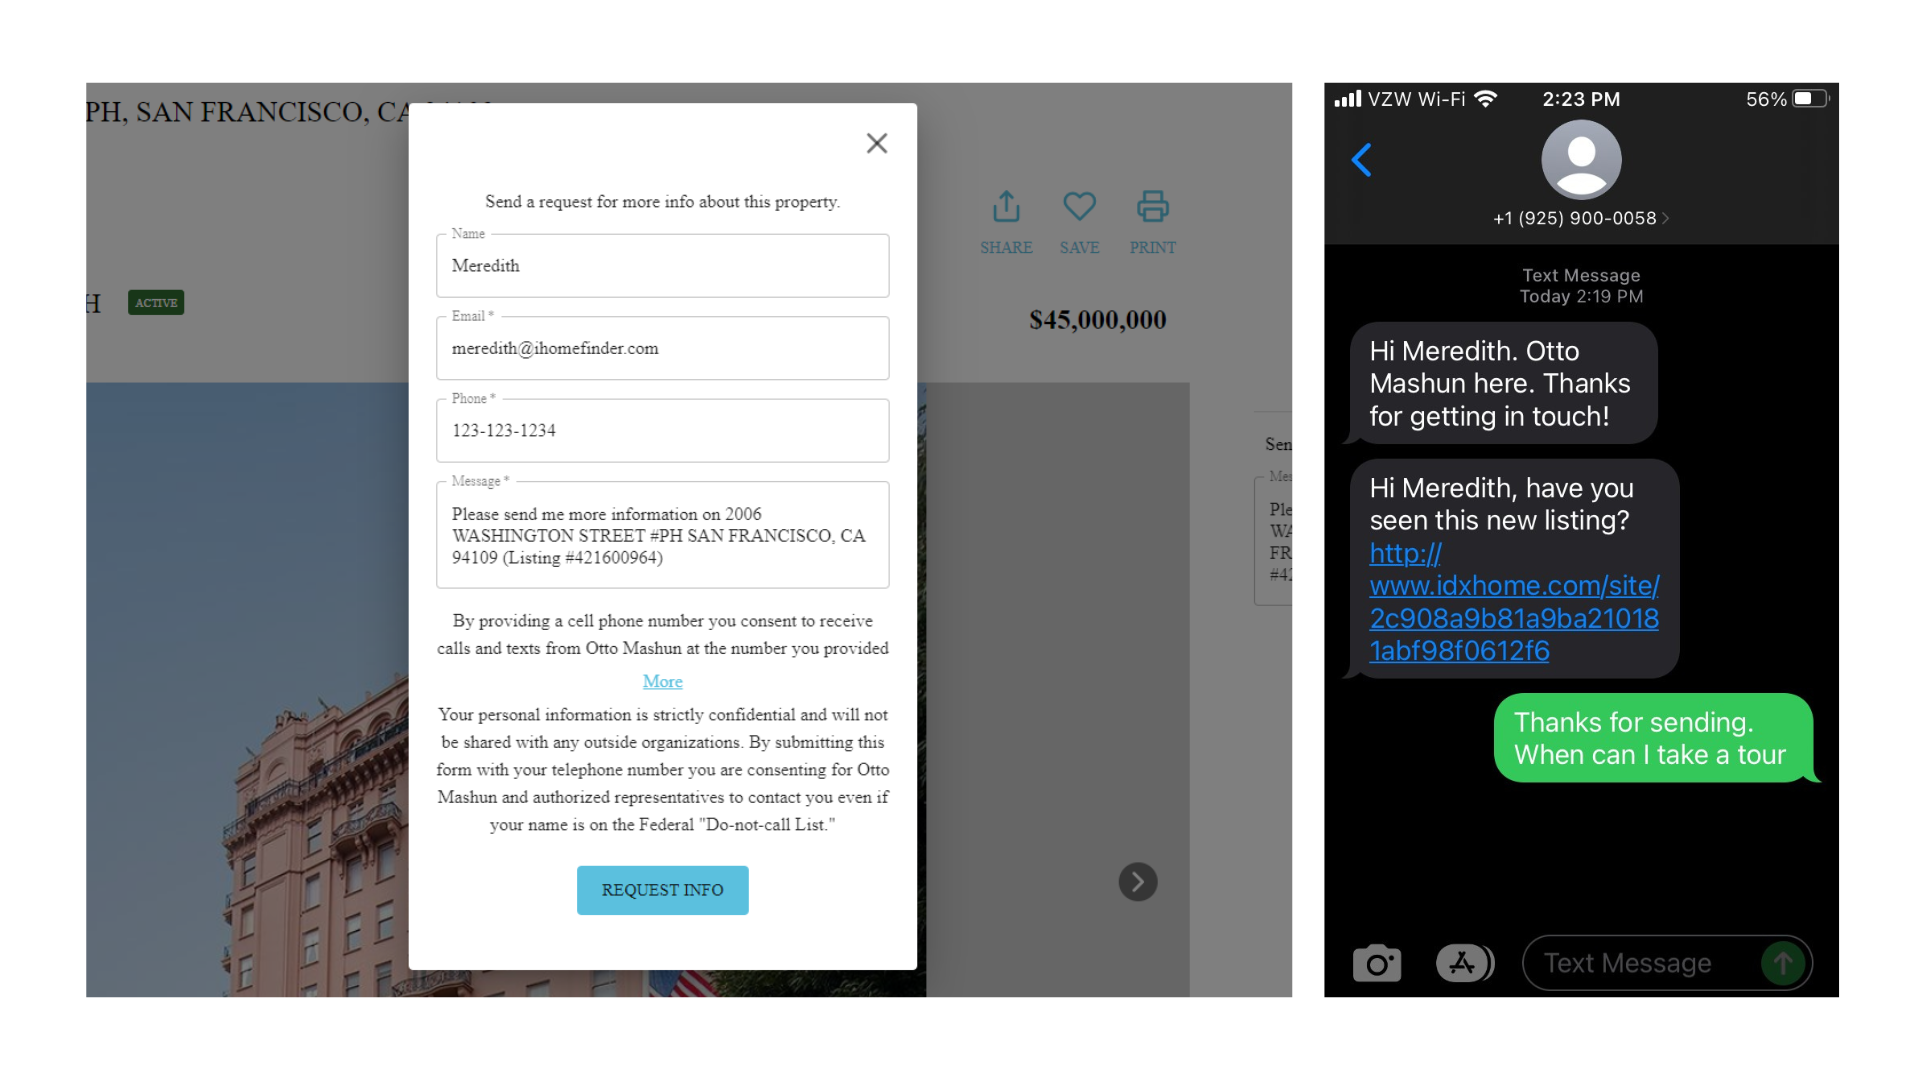
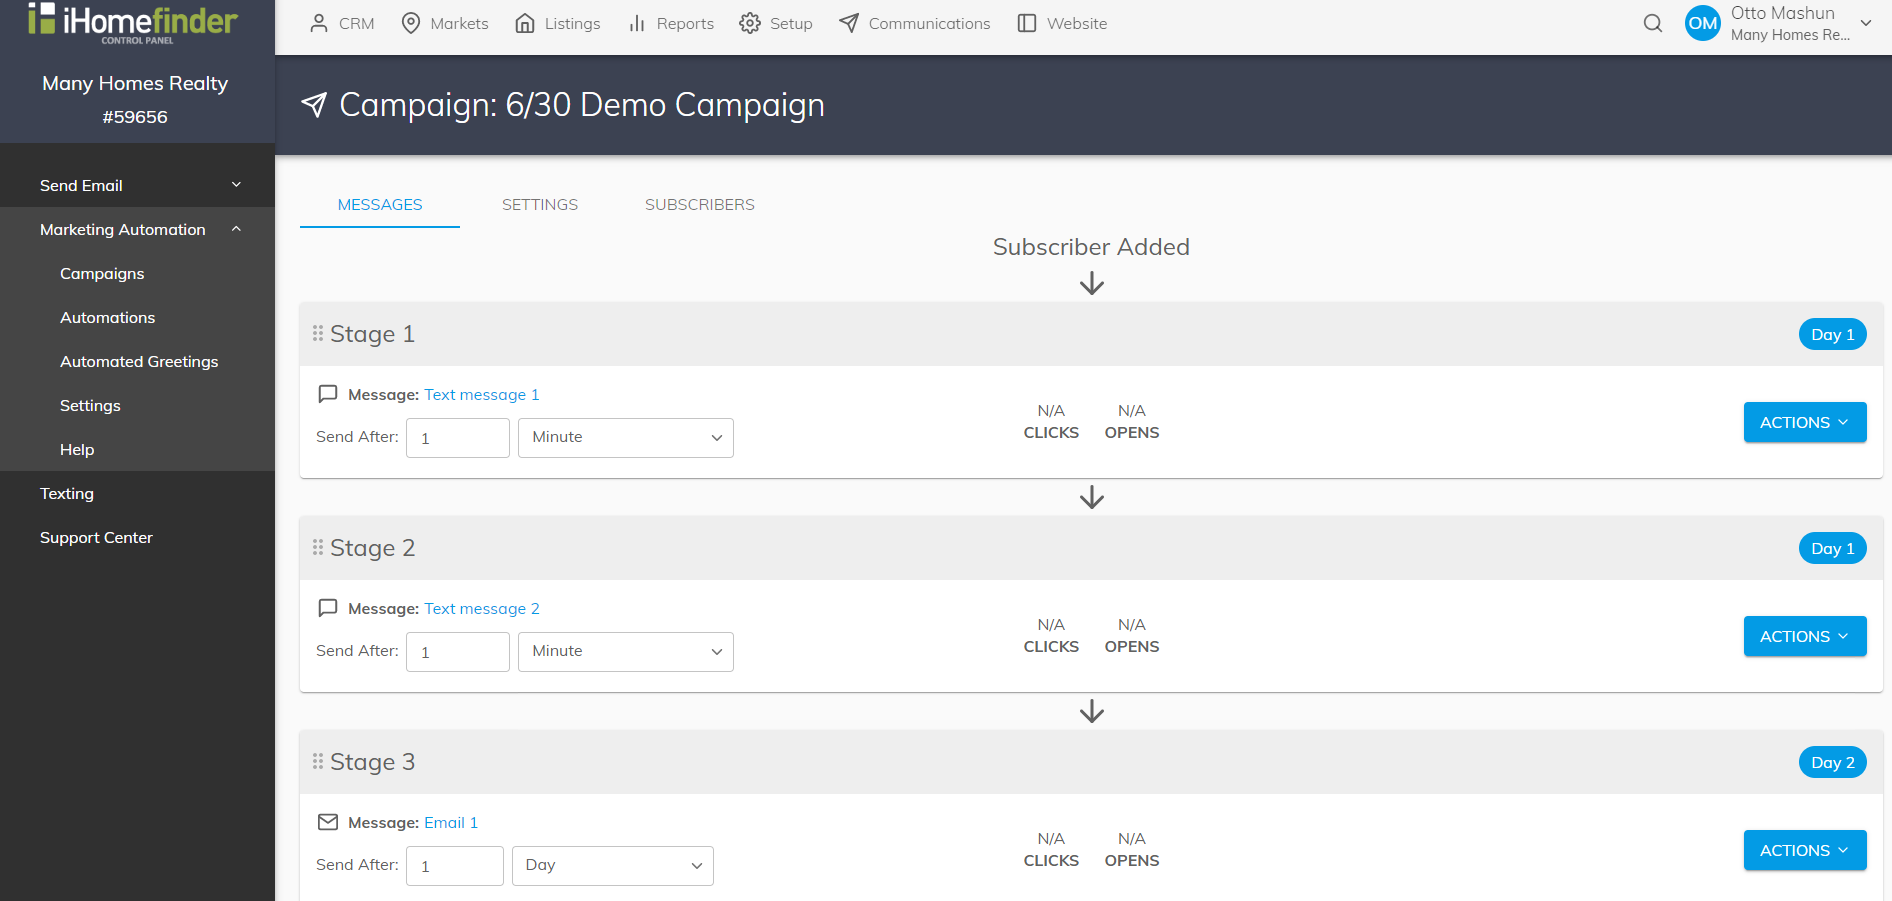
With the drip texting functionality, your Marketing Automation Campaigns will send emails and text messages to leads who opt in to receive text messages. Texting seamlessly integrates with automated drip campaigns so you can manage all your communication from the same place.
Eligible Content
Using your chosen area code, our system will rent a 10-digit phone number exclusively to send your texts. When a lead who has agreed to receive texts is added to a Marketing Automation campaign with text messages included, they will be sent text messages on the campaign’s schedule.
What Can be Included in a Text
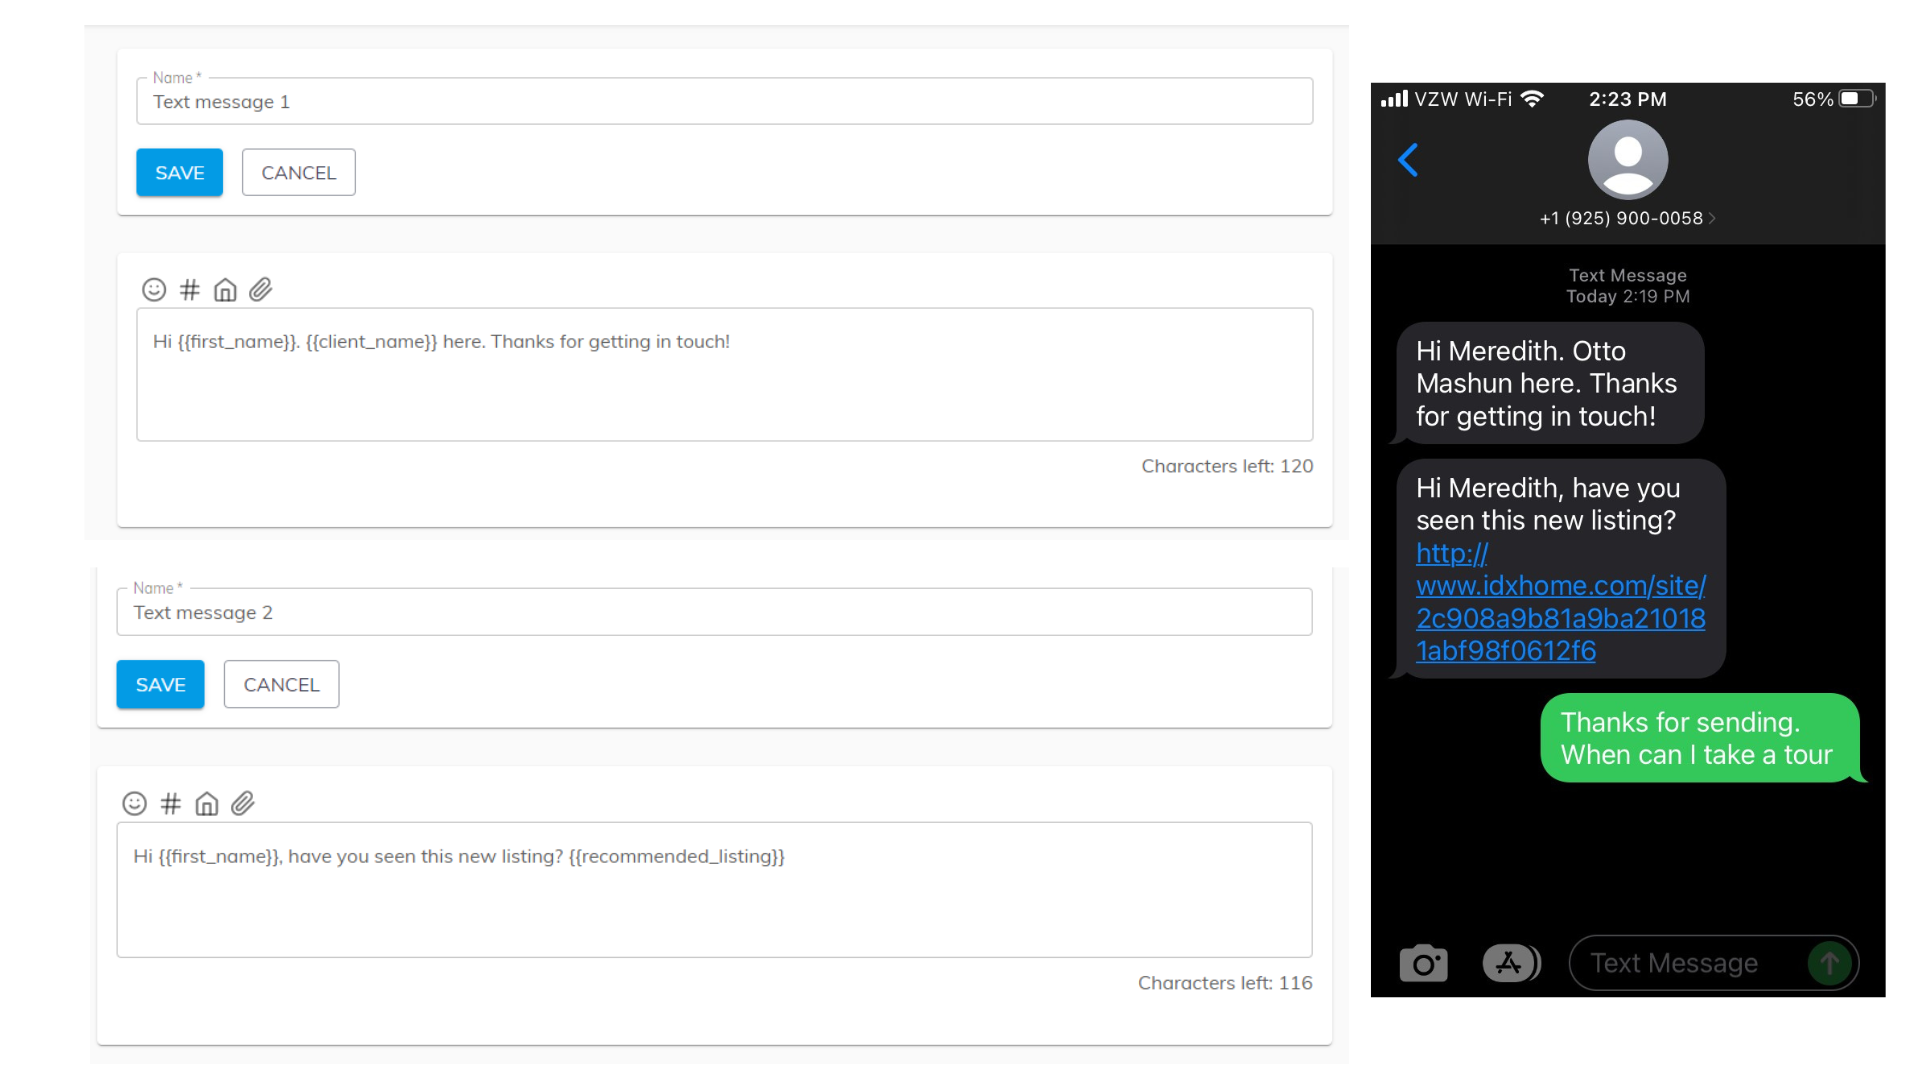
The software supports both SMS & MMS texting. You can text a lead emojis, images, gifs as well as recommended listings. The software also supports merge tags so you can easily include personalized information.
All personalized information in texts is determined by the lead the text is sent to. If a lead is assigned to an agent, then all information is customized to that agent and that lead.
Hybrid Texting Campaigns
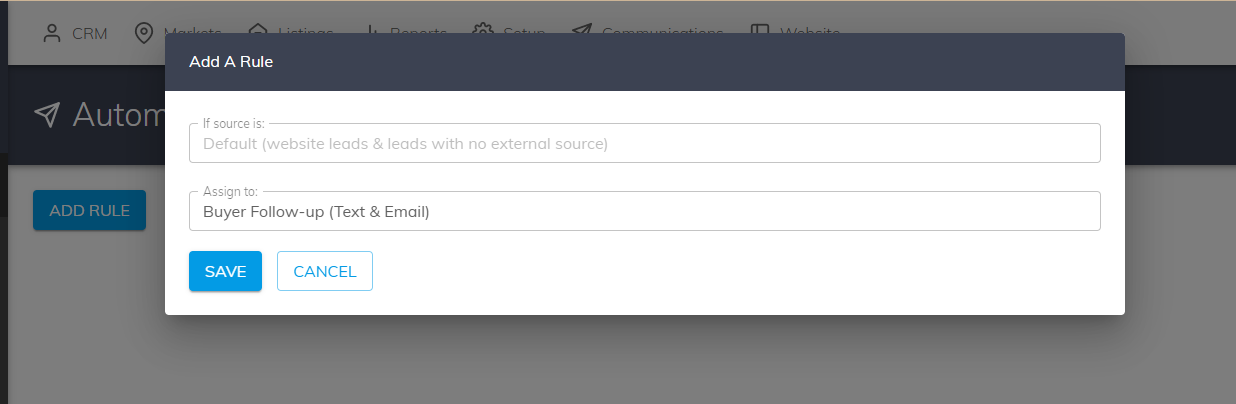
When you opt into this feature you will have new hybrid (containing both text and emails) campaigns in your account. Make sure you change your automation rules to use these new campaigns!
Administrators can create new texting campaigns or modify existing campaigns with text messages.
Lead Responses to Text Messages
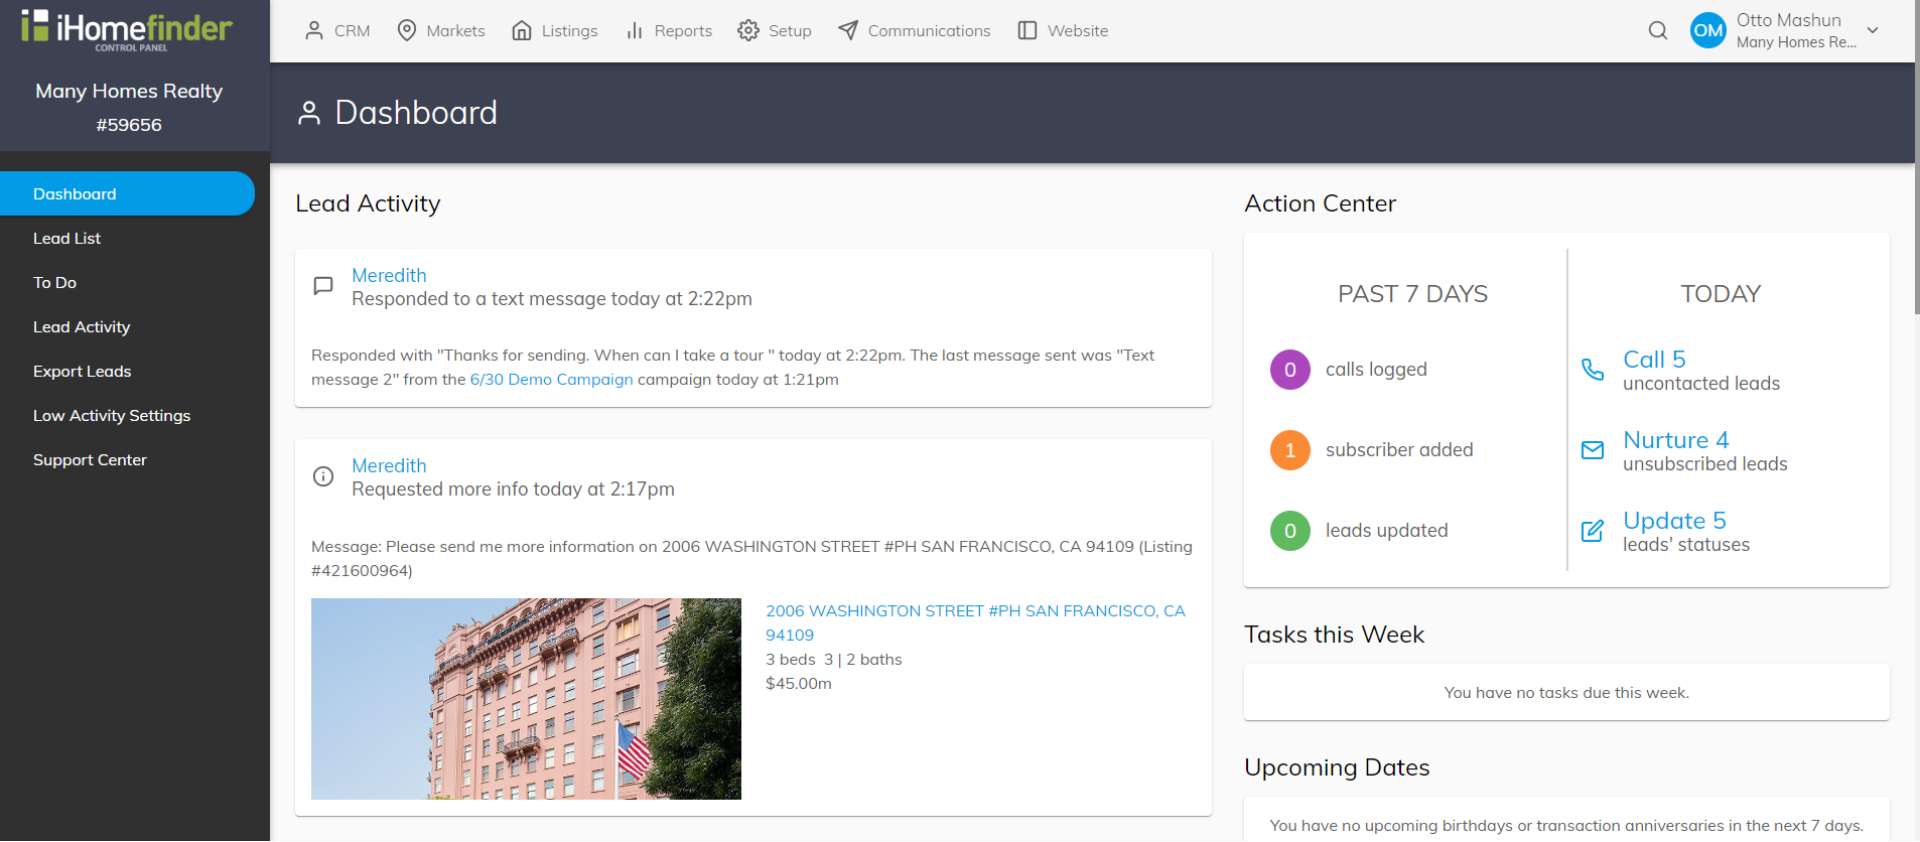
If a lead responds to a text message from a campaign, you will receive a notification with the lead’s response, the last text sent from your account and the lead’s contact information. The response will display on your account’s dashboard as well as the lead’s individual profile.
Administrators will see all responses to text messages, and can filter their dashboard to see responses to individual agents. Agents that manage leads can see their own lead’s responses to text messages.
Configuration
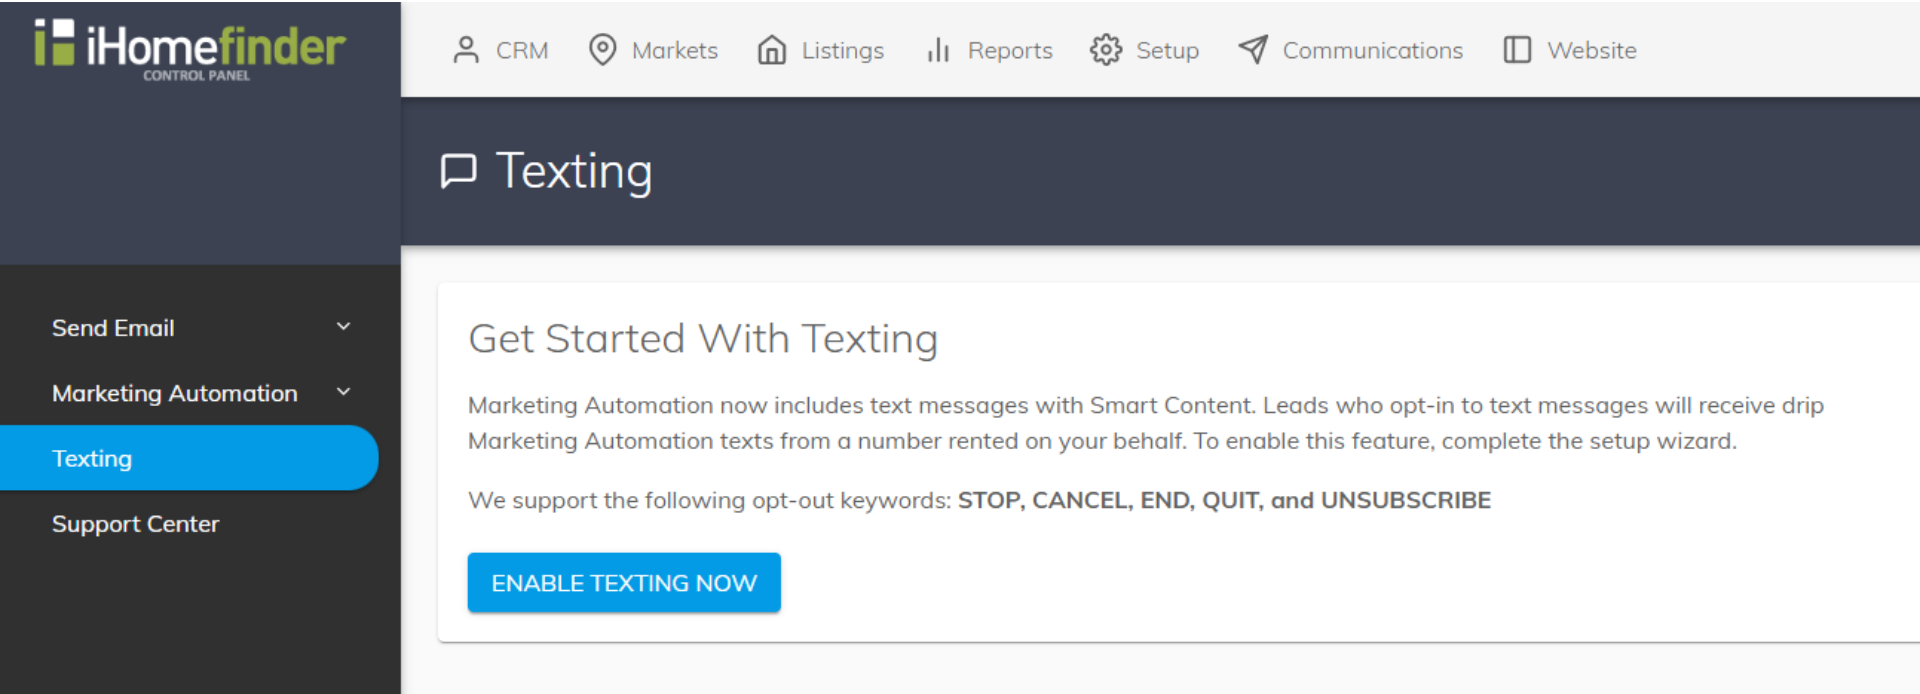
The first step to configure texting is to click Enable Texting Now under Communications > Texting. This will pop up a wizard where you will enter your texting number’s area code, call forwarding number (in case a lead calls the texting number) and time zone.
Change your marketing automation rules so they point leads to one of the new hybrid texting campaigns, or a texting campaign you created on your own.
Max Basics - Customized Emails
Section titled “Max Basics - Customized Emails”Individual Emails
Emails are called Messages in Marketing Automation. This section covers the key features you need to know when working with messages.
Creating a Message
Messages can be created from within a campaign. You can open an existing campaign or create a new one to add a message.
Click the name of the campaign to open it, then click the button to add a message
When adding a message to a campaign the following fields are required:
- Name - this is an internal field and will only be visible on the Messages page
- Email Subject Line - this is the text that will populate the subject line in the email sent to subscribers
All messages will include your default email branding header and footer when sent if this option has been selected on the Settings page. Email branding can be edited in the Optima Express plugin in the WordPress dashboard, or in the iHomefinder Control Panel if you are a Non-WordPress client.
To create the content of your message, drag and drop items from the right panel of the editor to insert them into the email body. To edit the properties of an item you’ve dragged into a message, click on it and the editable properties will appear in the right panel of the editor.
For example, if you’re adding a button to your email, after you’ve dragged the button item over to the message, click the button to insert the link destination or change the color and button text.
Adding Merge Fields to a Message
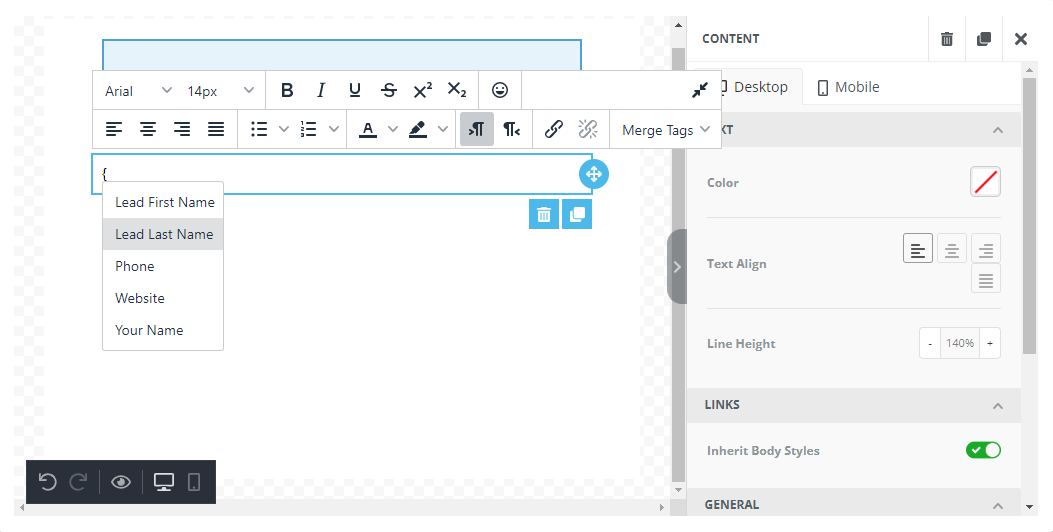
When writing a message, you can insert merge fields that will automatically include information such as your lead’s name, your own name, and phone number. To see and select a merge field to add to your campaign message, click and drag over a text box into the message body and start typing a left curly bracket “{” inside. A pop-up menu will appear with the merge field options you can select.
Adding Images to a Message
You can add your own images to the message by clicking and dragging the Image item from the Content tab right into the message area. Clicking on the Image Block in your message content will bring up the image options on the right panel where you can select the image you want to display. You can either upload the image or enter in an image URL that is hosted elsewhere.
Clicking the Apply Effects & More button will bring up an additional menu where you can also make edits like resizing or cropping your image.
Stock Images
Free stock images are also available in Marketing Automation campaign message creation. To add a stock image, click the Images tab on the right, then in the search bar, enter any terms you want to filter images with. Once you find an image you like, you can click and drag it over into the message content area where you’d want it to appear.
Adding Video to a Message
If you have YouTube or Vimeo videos you’d like to insert in your email, drag the Video item into your message and click on it. In the right panel, paste the URL of your video and a thumbnail image will be included in the message. When subscribers click, they’ll be brought to your video.
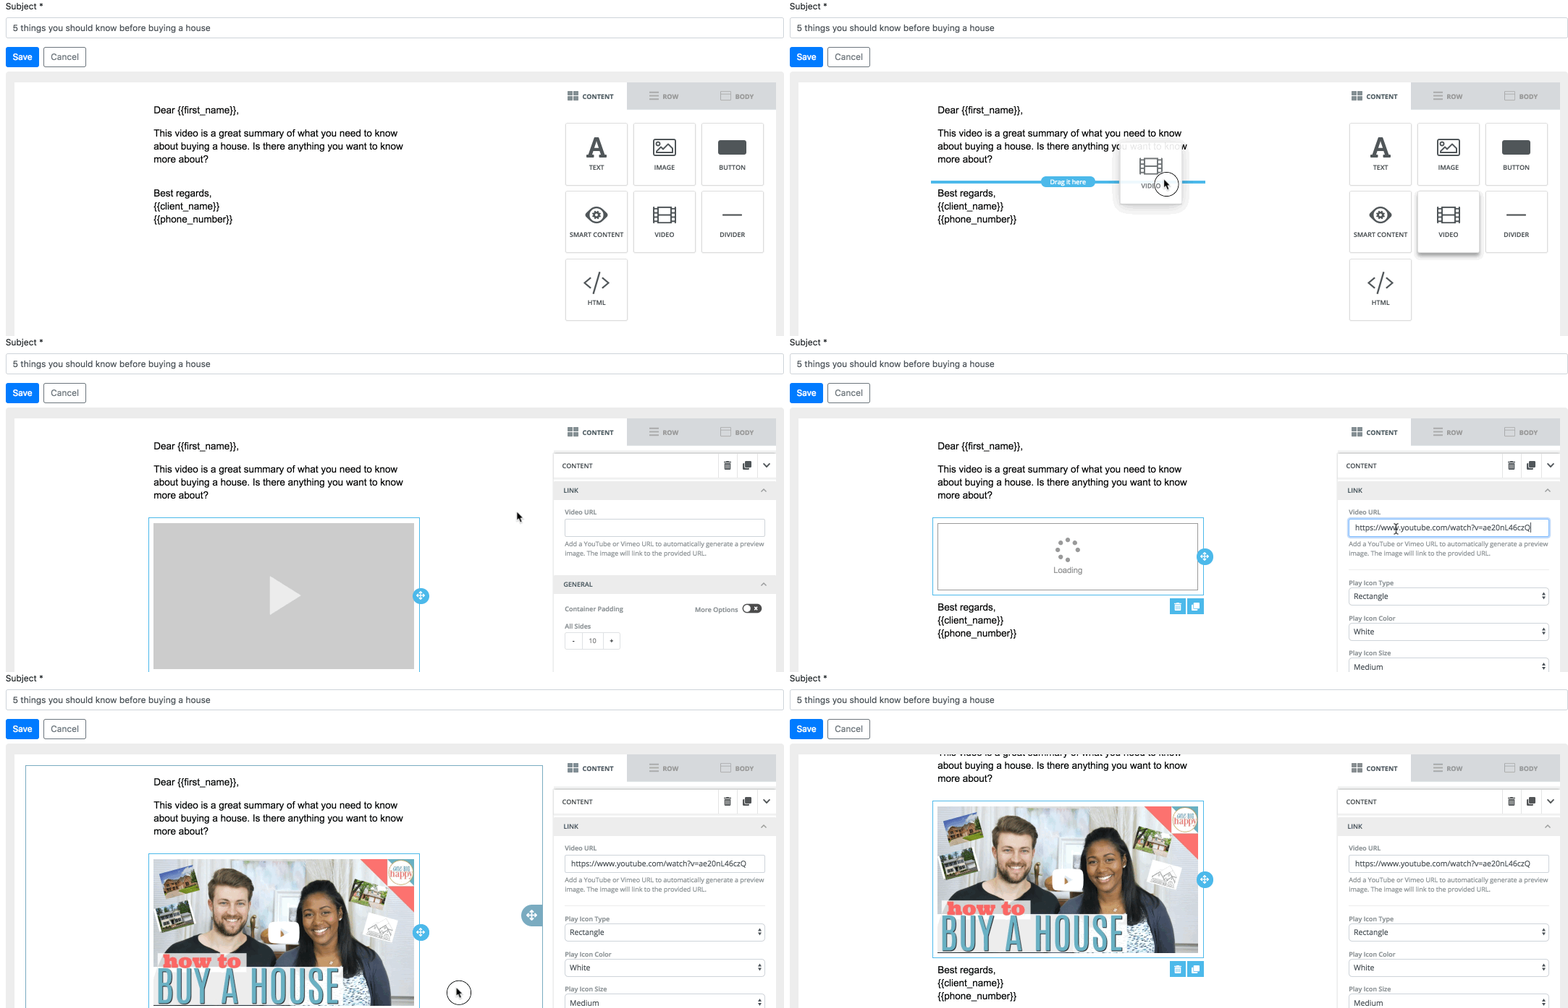
Make sure to hit Save when finished. After hitting Save, the message page will appear.
Scheduling a Message
After your message is saved, you will be brought back to the message page to schedule your message.
Messages are scheduled relative to the message sent before them (the first message is scheduled relative to when the subscriber was added). Enter the days or minutes that should elapse before your message will be sent.
For example, if you’re adding a message you would like sent one week after the previous message, you should set the message to send after 7 days. The message will be automatically sent after the time is selected.
Message Order
Message order can be changed by dragging messages into the desired order. New messages are added to the bottom of a campaign by default. The message order is automatically saved.
Message Actions
Messages have four possible actions:
- Copy - this creates an exact copy of the message at the bottom of the campaign
- Delete - this deletes the message and is not reversible
- Inactive - Messages set to Inactive are not sent to subscribers and are not factored into the campaign schedule. Messages below an inactive message will send after the time specified since the last active message. When changing the message type to inactive the reactivate option will appear.
- Reactivate - activates an inactive message
Changing the order of messages for campaigns with current subscribers
If the message order is changed on a campaign with subscribers, you risk sending duplicate content to those subscribers. Subscribers will follow the stages of a campaign in order as they exist on the Messages page. A subscriber on Stage 5 of a campaign will receive the message currently at Stage 5, even if that message was moved from Stage 3.