Campaigns and greetings
Max Basics - Automating Birthday And Transaction Anniversary Greetings
Section titled “Max Basics - Automating Birthday And Transaction Anniversary Greetings”This video provides a step-by-step guide on using the CRM to automate birthday and transaction anniversary follow-ups, ensuring you stay connected with your leads and past customers. It emphasizes the importance of recording birthdays and transaction anniversaries when adding or updating leads to streamline future engagement. The walkthrough begins with accessing the Lead List from the Performance dashboard, selecting a lead, and editing their profile to input the necessary dates.
Once the information is updated, the next step involves configuring the CRM’s communication settings to automate greetings. For birthdays, you activate the “Automatically Send Birthday Emails” option and create a personalized template by adding images and text. The video demonstrates the use of smart text features to enhance messages, ensuring they are engaging, with placeholders for personalized names and closings.
Similarly, for transaction anniversaries, you enable automated emails and design a greeting using a mix of image and text blocks. The example message reflects on the client’s journey since purchasing their home and acknowledges the memories created, with the option to expand the message using AI-powered text suggestions. The AI even detects and corrects any spelling errors for a polished final product.
The video concludes by showing how to preview the automated emails on different devices to ensure everything looks perfect. With these automations in place, the CRM takes care of follow-ups seamlessly.
Step-By-Step Instructions
-
Add Birthdays and Transaction Dates to Lead Profiles
-
When adding new leads, ensure you include:
- Birthday
- Transaction Anniversary Date
-
This information helps maintain long-term connections with past customers.
-
-
Update Existing Leads with Key Dates
-
Go to the Performance Dashboard and click on Lead List in the left column. Use the search bar to find the lead you want to update (e.g., Cameron Mitchell).
-
Click Edit.
- Scroll to the Birthday and Transaction Anniversary fields, enter the dates, and click Save.
-
-
Enable Automated Greetings
- Click on the Communications tab at the top of the screen.
- In the left sidebar, select Marketing Automation, then Automated Greetings.
-
Set Up Automated Birthday Emails
-
Activate Birthday Email Automation:
- Under Birthday Greetings, check the Automatically Send Birthday Emails option and Save.
-
Create the Birthday Greeting:
-
Drag an image block into the email template and select an image.
- Either Upload an Image from your Computer, use a pre-existing image in the CRM or use the Magic Image feature to generate a custom AI Image.
-
Drag a text block below the image and enter your message.
- Example: “Happy Birthday, [lead name]!”
- Use “Smart Text” AI to expand the message.
- Personalize the closing with another placeholder for your name.
- Click Save when finished.
-
-
-
Set Up Automated Transaction Anniversary Emails
-
Activate Anniversary Email Automation:
- Select Send Automated Anniversary Email and Save.
-
Create the Anniversary Greeting:
-
Add an image block
- either upload an image from your computer, select one from the CRM’s library, or use the AI “Magic Image” generator.
-
Drag a text block below the image and enter a simple message:
-
Example: “Happy house anniversary! Can you believe another year has passed since you moved in?”
-
Use “Smart Text” AI to expand the message:
-
Add your salutation and an appropriate placeholder for your name.
-
Preview and Finalize Emails
-
Click the Preview icon (eyeball) to see how the emails will look on:
- Desktop
- Tablet
- Phone
-
-
-
-
If everything looks good, click Save.
-
Automated Greetings
Users can set up email greetings that are formatted to automatically send on the date of a lead’s birthday or transaction anniversary.
We recommend setting up an email and calendar integration between your email and the control panel for improved deliverability for your sent emails.
Automated Greetings emails will be automatically sent to a lead if they have a date set in their lead record for Birthday or Transaction Anniversary. If a lead doesn’t have a date saved on their profile, they will not receive an Automated Greeting email.
- Navigate to Communications > Marketing Automation > Automated Greetings.
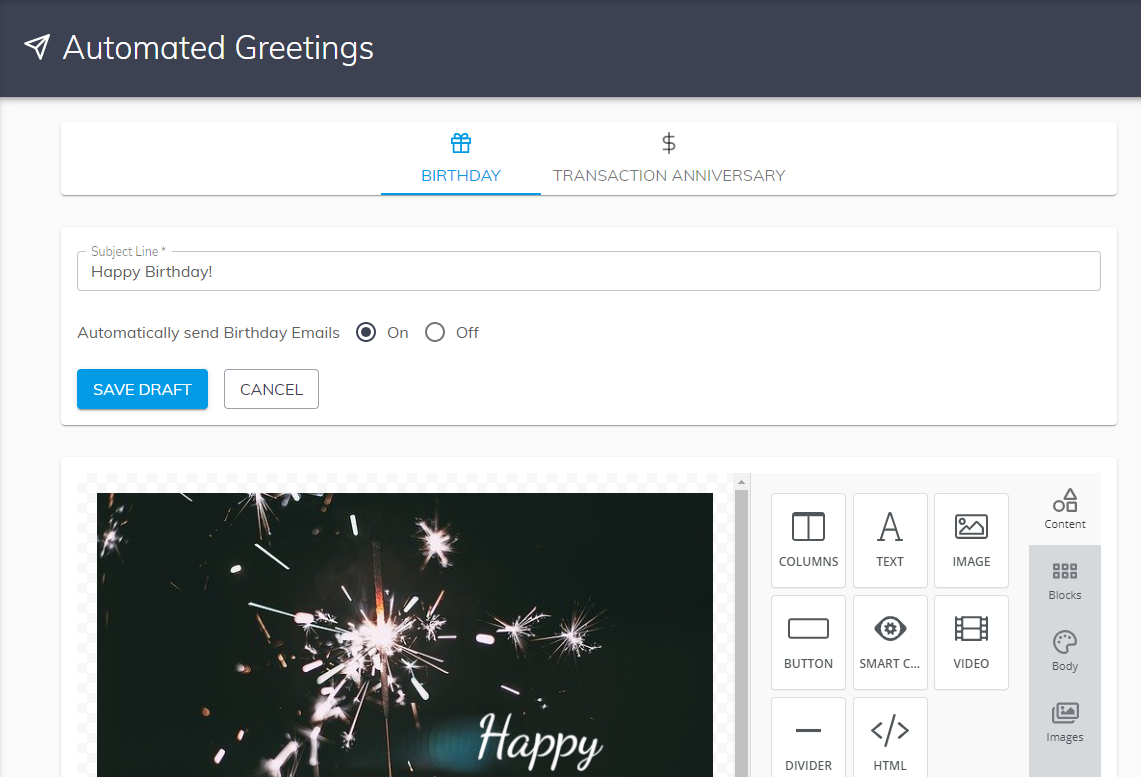
- Select the Birthday tab or Transaction Anniversary tab at the top of the screen to choose which email template to edit.
- The Subject Line field sets what subject line leads see when they receive the automated greeting email.
- You can turn on or off the Automated Emails by selecting an option in the Automatically send Birthday Emails field or Automatically send Transaction Emails.
- You can update the content of the template by using the email editor on the bottom half of the screen.
- After making any changes, click the SAVE button to save your changes.
Max Basics - Edit Campaigns
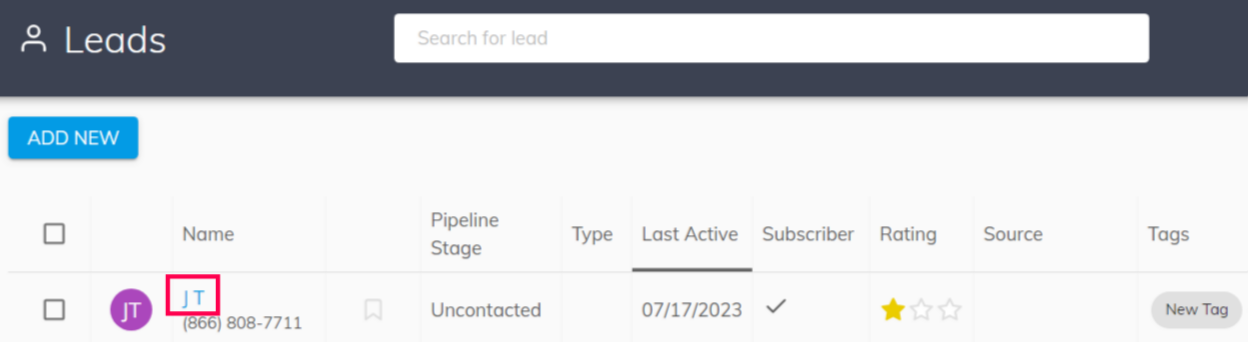
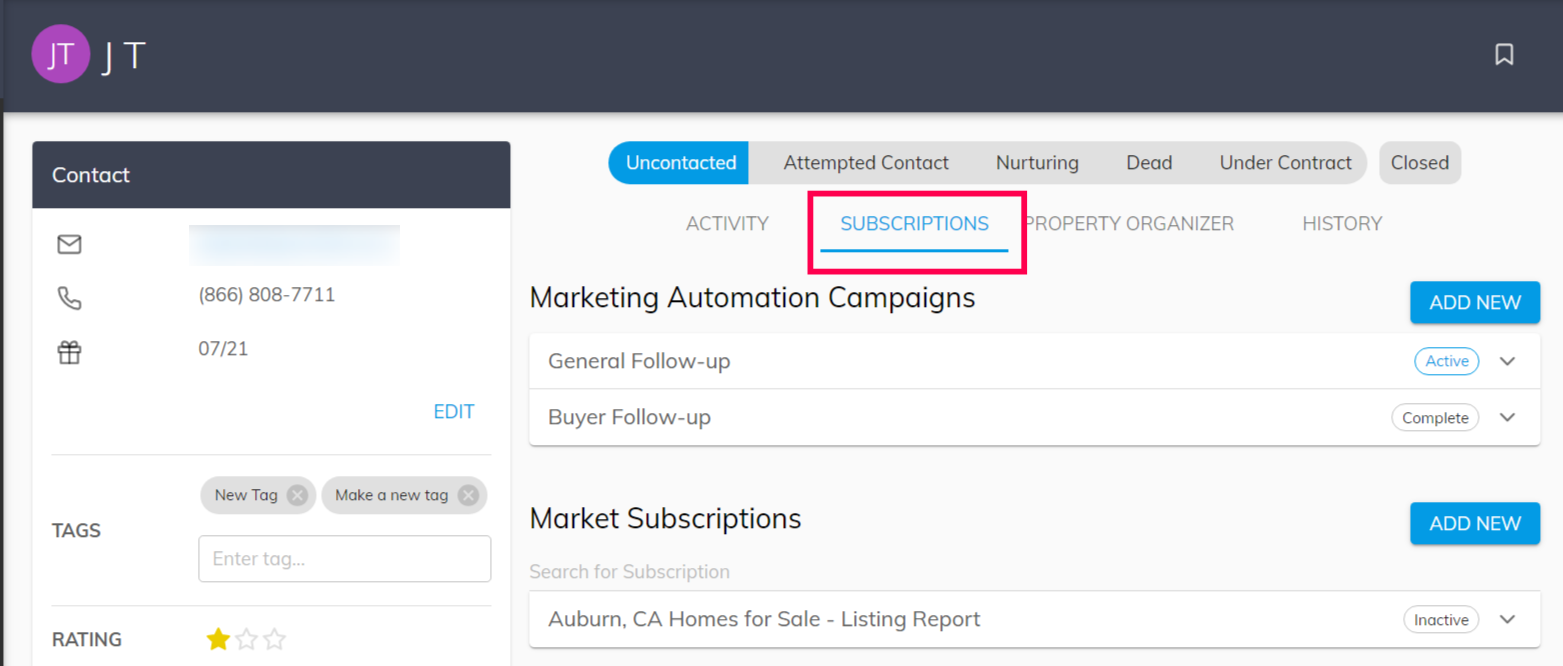
Section titled “Max Basics - Edit Campaigns”To access a lead’s Marketing Automation Campaigns, click on the lead’s name and then select Subscriptions on the right.
The Marketing Automation Campaigns section only appears for accounts with a CRM package.
This section displays marketing campaigns a client subscribed to and data on the emails sent for the campaign.
In the Marketing Automation Campaign section, each subscription includes the following information:
- Campaign name
- Whether the subscription is active, inactive, or completed
- The number of emails remaining until the campaign is completed for that client
- A table of click-through, open and send data for every email sent in the campaign
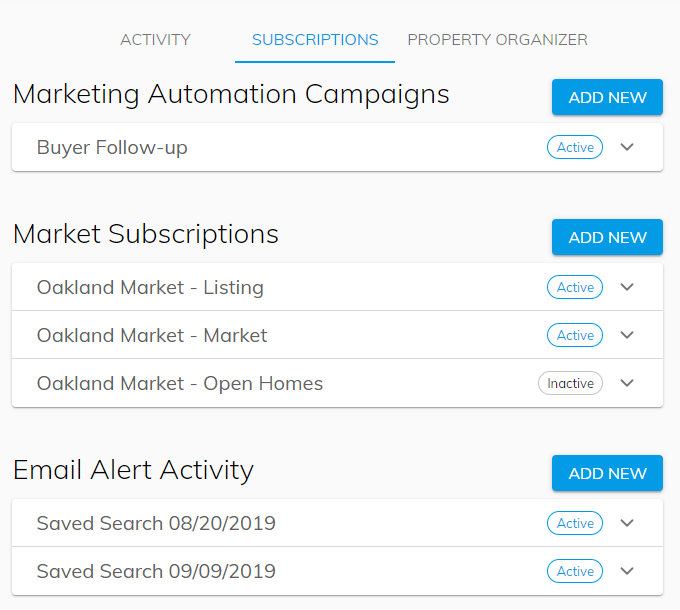
How to create a new Marketing Automation Campaign Subscription
- Click the “ADD NEW” button to the right of the “Market Automations Campaign” title.
- A screen will pop up asking you to select a campaign. (If you don’t have any campaigns created yet, you will need to navigate to COMMUNICATIONS and create one first).
- After selecting a campaign, click the “SAVE” button.
- Your subscription has been created. A new row now appears under the “Market Automation Campaigns” section.
How to deactivate a Marketing Automation Campaign
- Locate the subscription you want to deactivate and open it.
- Click the “DEACTIVATE” button in the subscription box in the lower right.
- When prompted, click “YES” to finish deactivating the subscription.
Market Subscriptions
The Market Subscriptions section displays all Market Reports to which a lead has subscribed. Market Reports have three types: Market, Listings, and Open House. You can assign a lead to just one type or all three types.
In the Market Subscriptions section, each subscription includes the following information:
- Market name (i.e., “Condos in Berkeley under $800K”)
- Market Report type
- Whether the subscription is active or inactive
- Filtered property search criteria for the Market
- The number of Market emails that have been sent to the lead in the past 30 days
- A table of click-through data for the subscription
How to create a new Market Subscription
- Click the “ADD NEW” button to the right of the “Market Subscriptions” title.
- A screen will pop up asking you to select a Market. (If you don’t have any Markets created yet, you will need to navigate to MARKETS and create one first).
- After selecting a Market, all three Market Report types will be selected: Listings, Open Homes, and Market. Deselect any reports where you don’t want the lead on the subscription.
- Click the “SAVE” button.
- Your subscriptions have been created. For each report type you selected, a new row is made under the “Market Subscriptions” section.
How to deactivate a Market Subscription
- Locate the Market Subscription you want to deactivate and open it.
- Click the “DEACTIVATE” button in a Market Subscription box in the lower right.
- When prompted, click “YES” to finish deactivating the Market Subscription.
Max Basics - Setting up Text Messaging Campaigns
Section titled “Max Basics - Setting up Text Messaging Campaigns”You will need to click on “Enable Texting Now”
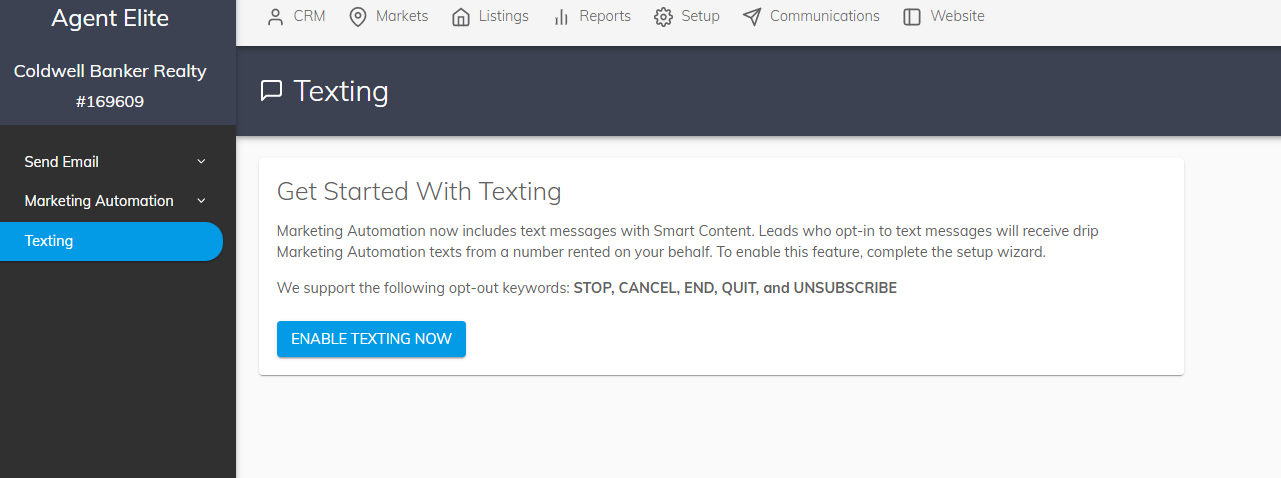
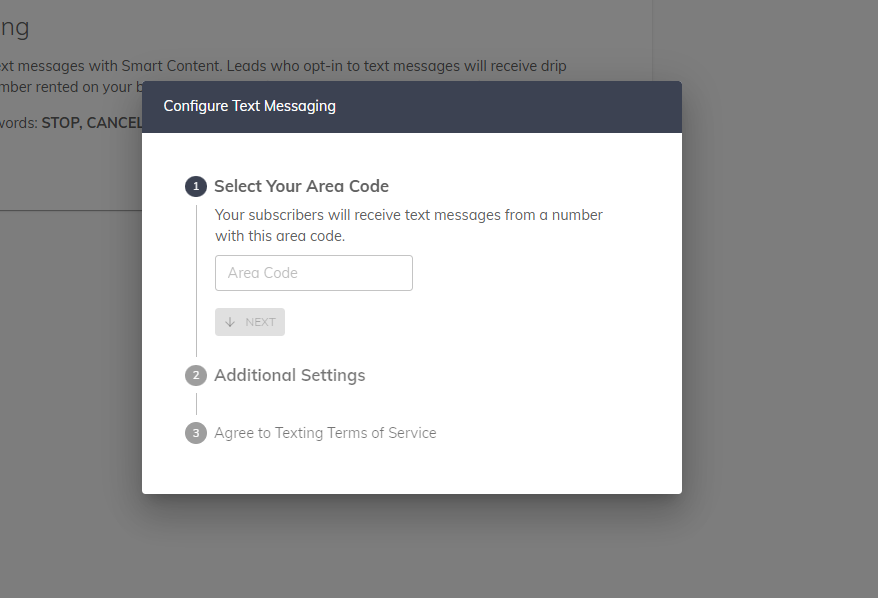
Select the Area Code they want to use. Then click “NEXT”
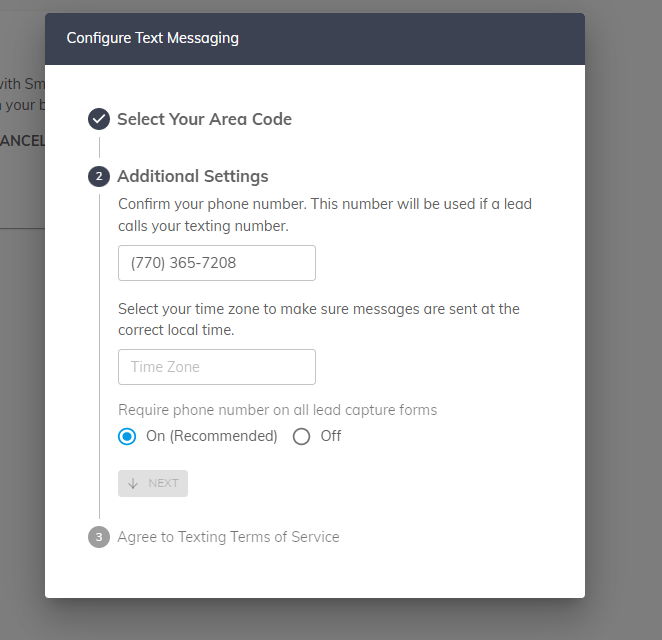
Then Confirm Your Cell Phone number and select Time Zone.
Agree To Text Terms of Service.
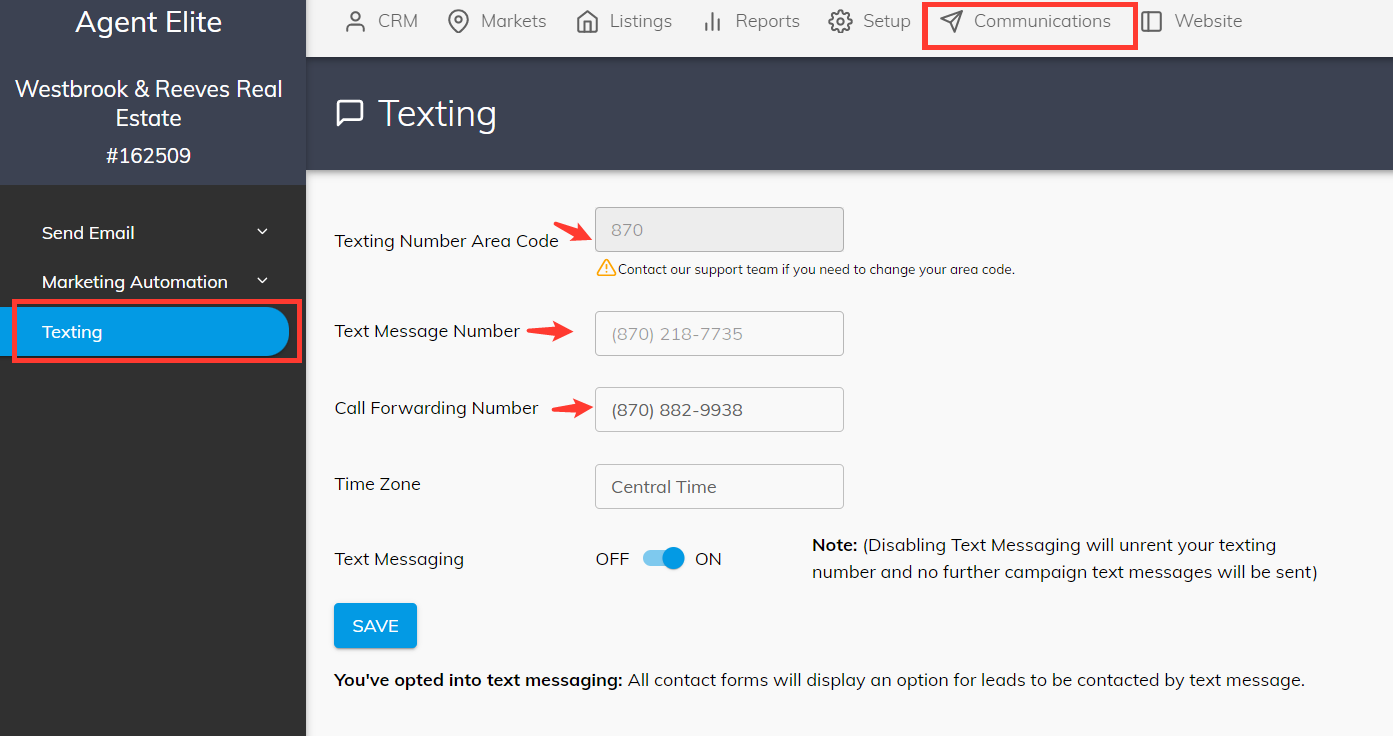
After Completion it should look like this:
-
Marketing Automation
- Campaigns
- Buyer, Seller & General Follow-up (text and email)
- Select the campaigns to edit.
-
Automation
-
Add New
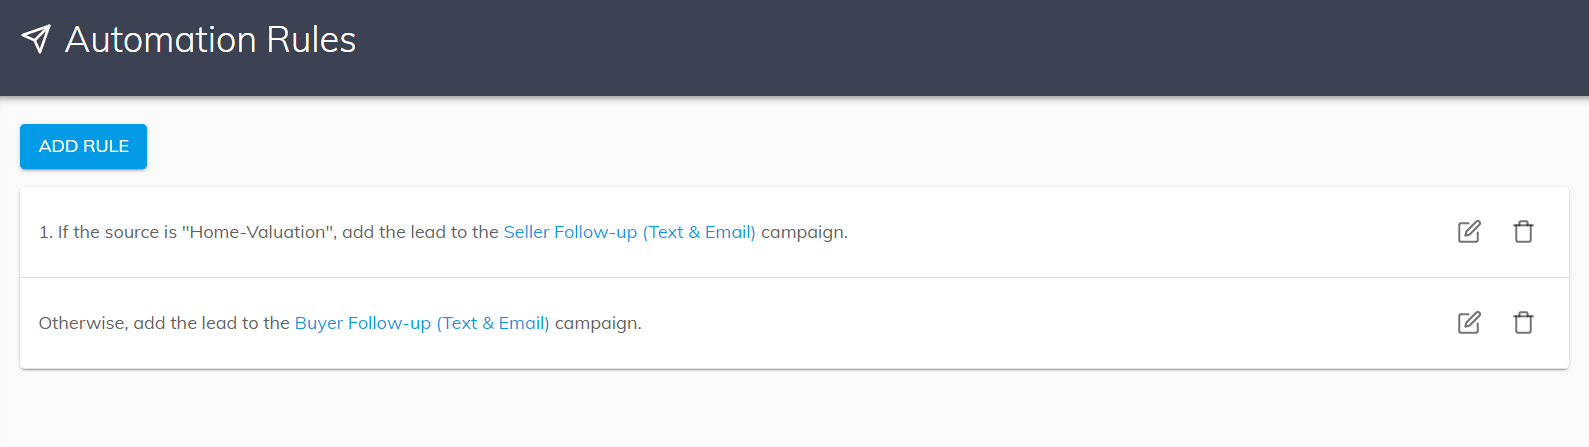
- Source: Home-Valuation
- Campaign: Seller Follow-Up (Text & Email)
-
-
Add New
-
Source: Default
-
Campaign: Buyer Follow-Up (Text & Email)