
Adding a New Blog Post (2.0 Websites)
Blog posts keep your website fresh with market updates, local news, buying and selling tips, and anything else your clients want to read. Regular posts help you get found in local searches and show that you know your area.
You write posts in your website dashboard using the block editor. New posts appear on your Blog page automatically, newest first.
Before you start
Section titled “Before you start”Log in to your website through your Agent Elite User Portal. Navigate to Website in your left menu, and use the Edit Site button to log into your website.
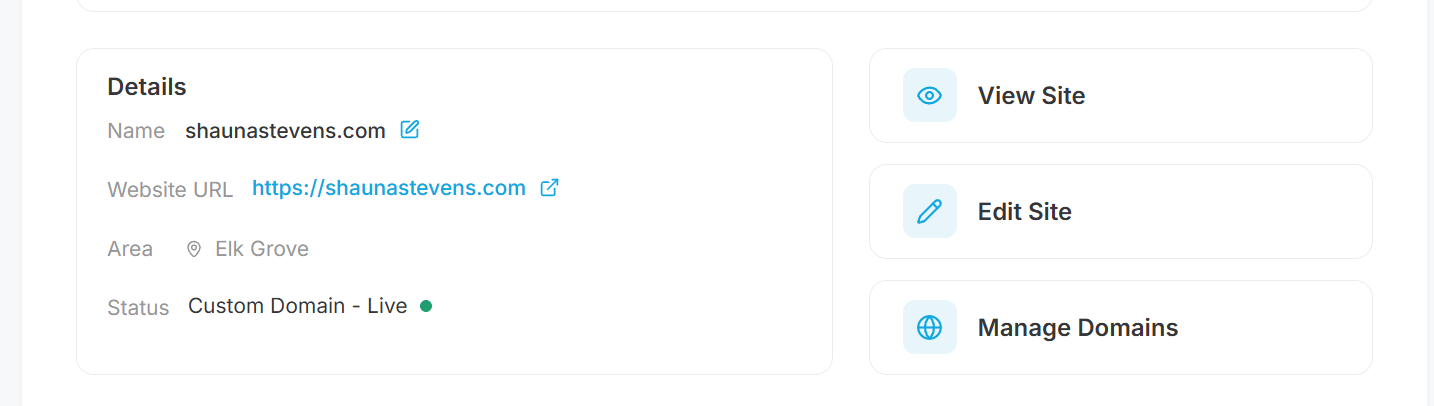
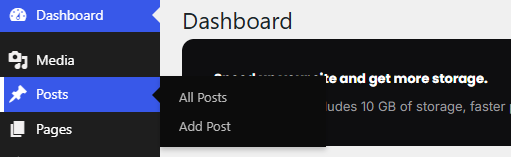
Step 1: Create the post
Section titled “Step 1: Create the post”- In the WordPress dashboard, go to Posts > Add New Post.
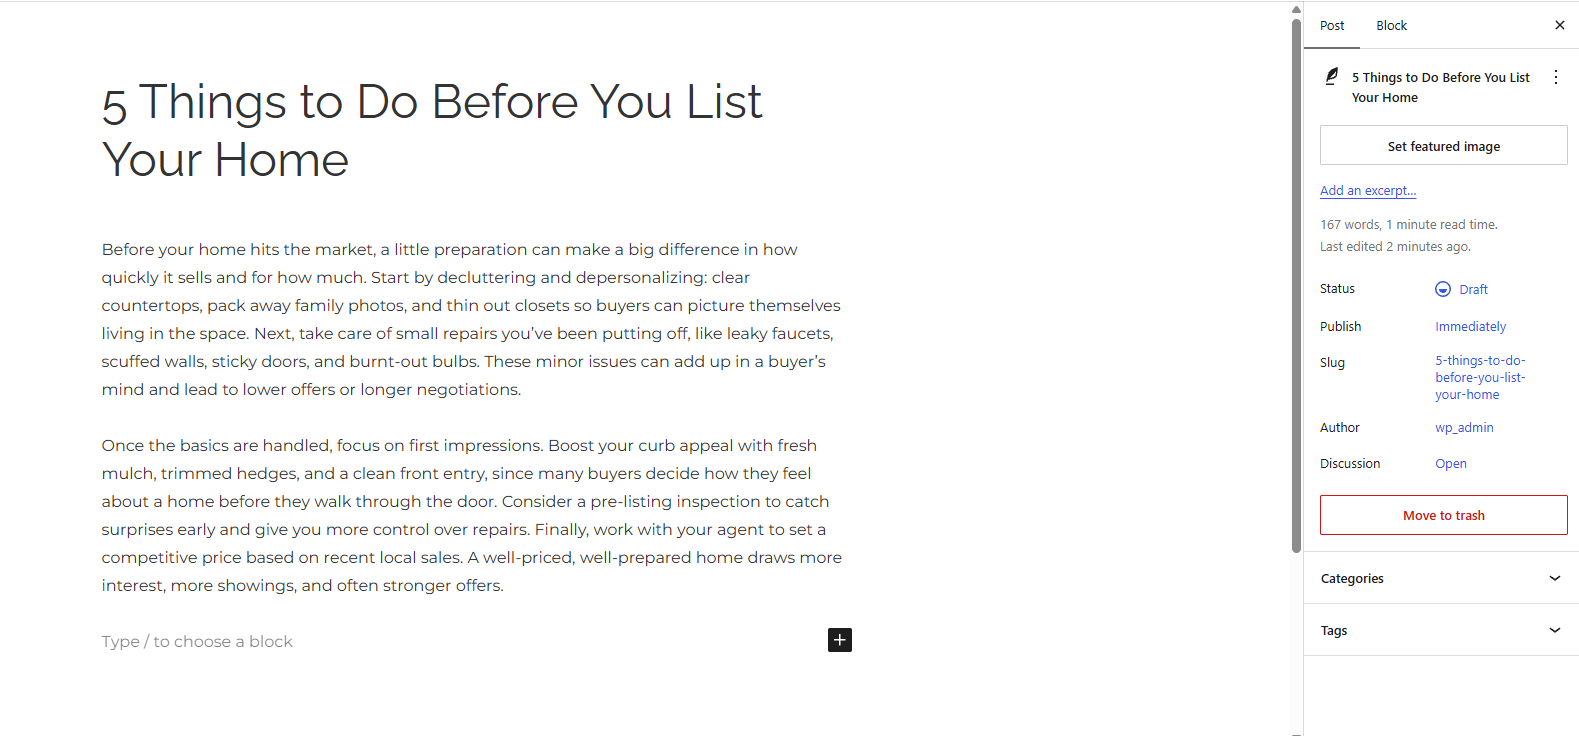
- Type your post title at the top of the editor, for example “5 Things to Do Before You List Your Home”.
Step 2: Write the post
Section titled “Step 2: Write the post”Posts are built from blocks. Start typing below the title to add a paragraph, or click the + button to add other blocks. The ones you’ll use most are:
- Paragraph for text
- Heading for section titles. Your post title is already the main heading, so use H2 for sections and H3 for sub-sections. Clear headings make posts easier to read and help search engines understand them.
- Image for photos inside the post
- List for bulleted or numbered lists
- YouTube (or Embed) to add a video by pasting its link
Your site’s Agent Elite Blocks work in posts too. For example, add AE Contact Form at the end of a post so readers can get in touch, or Featured Listings to show your listings.
When you add an image, fill in its Alternative Text in the block settings on the right. This short description of the image is read aloud to visitors who use screen readers, and search engines use it too.
Step 3: Add a featured image
Section titled “Step 3: Add a featured image”The featured image is the post’s cover photo. In the settings sidebar on the right, open the Post tab, click Set featured image and choose or upload a photo. A wide, landscape photo works best.
Your featured image appears:
- As the banner at the top of the post, behind the post title and date, with a dark overlay so the text is easy to read
- On your Blog page. Your newest post is shown large at the top, with the rest in a grid below.
- In the Related Posts at the bottom of your other posts
- In the AE Latest Posts block, if your homepage or another page uses it
Always add a featured image. Without one, the post’s banner is a plain dark area and its card on the Blog page has no picture.
Step 4: Choose a category
Section titled “Step 4: Choose a category”Categories group related posts, for example “Market Updates”, “Buying Tips” or a neighborhood name. In the Post tab of the sidebar, open Categories and tick one or more. To create a new category, click Add New Category.
Categories matter on your site because:
- The post’s categories are shown as links at the top of the post. Readers can click one to see every post in it.
- The Related Posts section at the bottom of each post shows up to three other posts from the same categories. If a post has no category, it shows your three newest posts instead.
Posts without a category are filed under Uncategorized, which isn’t shown to visitors.
Step 5: Add an excerpt (optional)
Section titled “Step 5: Add an excerpt (optional)”Your Blog page and the post cards show a short preview of each post. By default, this is the first words of the post (about 50 words for the top post on your Blog page, and 20 for the others). To write your own preview instead, open Excerpt in the Post tab and type a sentence or two.
A custom excerpt is useful when your post starts with something that doesn’t make a good preview, like a photo caption or a date.
Step 6: Check the SEO settings
Section titled “Step 6: Check the SEO settings”Scroll below the editor to the Theme SEO Settings box. It controls how the post appears in Google and other search engines:
- Custom Document Title: the title shown in search results and on the browser tab
- Meta Description: the short summary shown under the title in search results
- Meta Keywords: a list of keywords (search engines mostly ignore these)
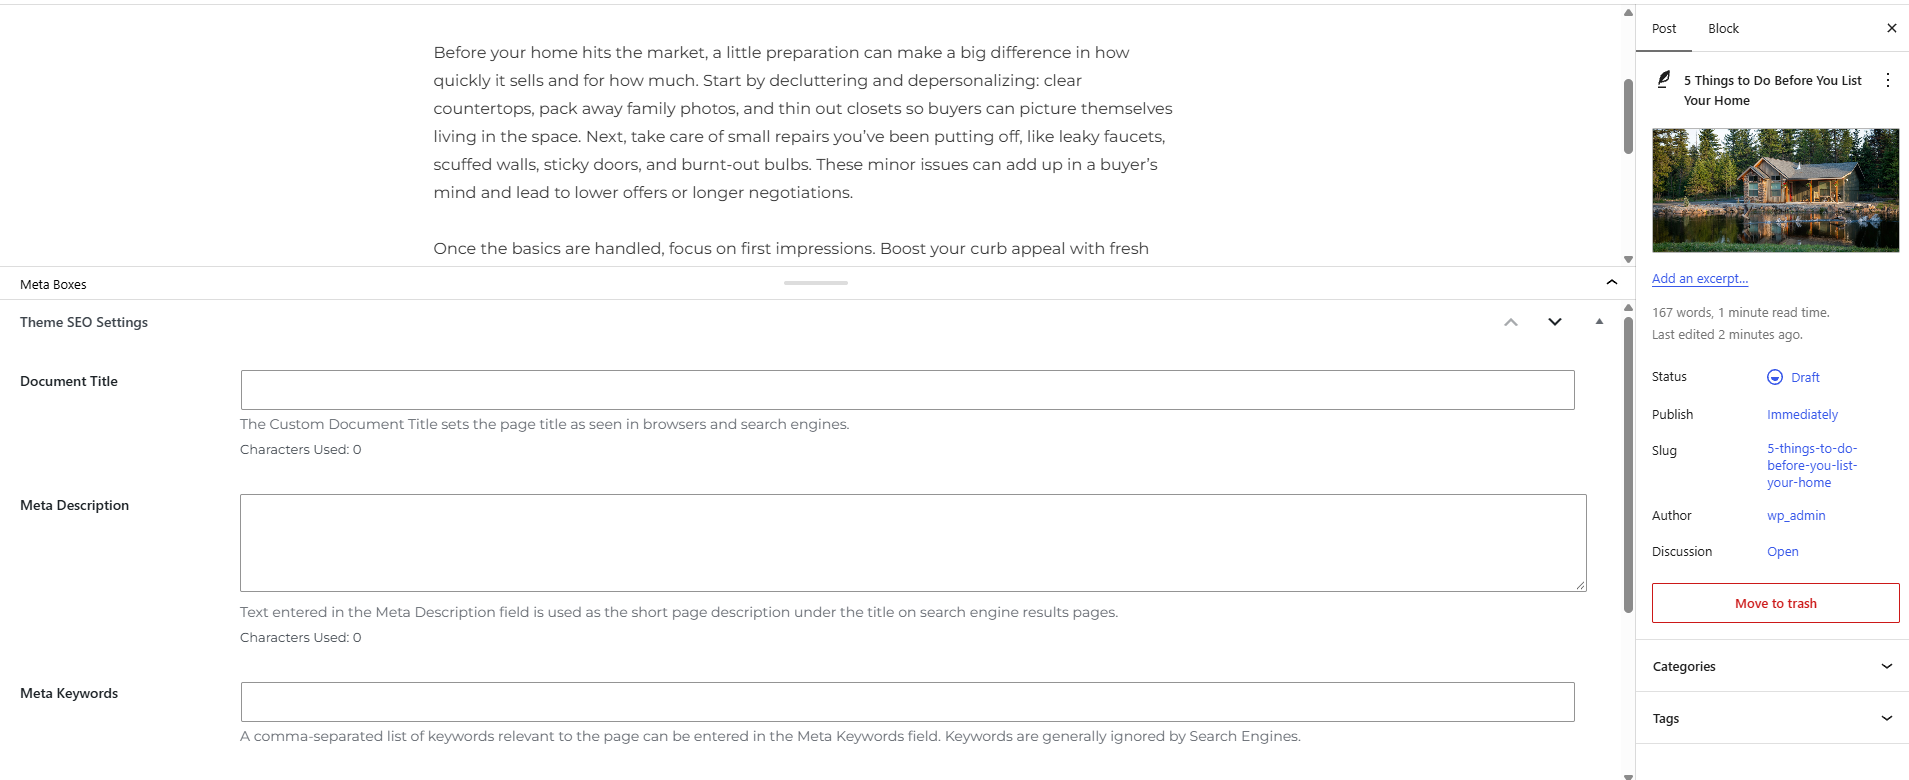
The first time you save, these are filled in for you:
- Title: “Post title | Real Estate Insights”
- Description: “Read “Post title” — insight from the Your company name real estate blog.”
They’re only filled in when they’re empty, so they never overwrite anything you’ve written. They’re also not updated if you change the post title later, so update them yourself if you do.
For better results in search, replace the automatic description with one or two sentences about what the reader will learn, for example “Planning to sell this spring? Here are five quick fixes that help Eugene homes sell faster.”
Step 7: Publish or schedule
Section titled “Step 7: Publish or schedule”- Click Preview at the top right to see the post as readers will.
- Choose when it goes live:
- Publish now: click Publish, then Publish again to confirm.
- Schedule for later: in the Post tab, click the date next to Publish (it says Immediately), pick a date and time, then click Schedule. The post goes live on its own at that time.
- Not ready yet: click Save draft. Drafts aren’t visible to the public. Find them later under Posts > All Posts.
The date shown on the post is its publish date.
Where your posts appear
Section titled “Where your posts appear”- Your Blog page. New posts appear here automatically, newest first. You don’t need to add each post to your menu.
- The AE Latest Posts block, on any page that uses it (often the homepage). It shows your newest posts, three by default.
- Related Posts, at the bottom of your other posts in the same categories.
Changing the Blog page banner
Section titled “Changing the Blog page banner”The banner at the top of your Blog page has its own image, separate from your posts. To change it, go to Agent Elite > Theme > Blog and update the Blog Page Hero Image. If none is set, a stock photo is used.
Troubleshooting
Section titled “Troubleshooting”My post isn’t on my Blog page
Section titled “My post isn’t on my Blog page”Check Posts > All Posts. If the post says Draft or Scheduled next to its title, it isn’t live yet. Open it and publish it.
The banner at the top of my post is blank
Section titled “The banner at the top of my post is blank”The post has no featured image. Add one (see Step 3) and click Update.
The Related Posts at the bottom aren’t related
Section titled “The Related Posts at the bottom aren’t related”The post has no category, or it’s the only post in its category, so your newest posts are shown instead. Add a category that your other posts share.